December 24, 2014 (Modified December 29, 2014 – Added Plex Support Section, January 11, 2015 – Added Nagios Web Status and Fixed Status Logging, April 5, 2015 – Added Plex/Nagios/Wordpress Stress Test, May 25, 2015 – current Plex download supports CPU in DS415+)
(Back to the Previous Post in the Series)
This article describes how to compile and run Nagios 4.0.8 (with 2.0.3 plugins) on a Synology DiskStation DS415+ (64 bit), which utilizes an Intel Atom Avoton processor (cat /proc/cpuinfo indicates that the unit is using a 2.40GHz Atom C2538, and utilizes the DSM 5.1-5021 (the latest version as of December 24, 2014) operating system. Nagios is a very useful network monitoring (and even Oracle Database monitoring with plugins) utility that uses email or other communication means to report device or service outages. Not all Synology DiskStation NAS devices use Intel based CPUs – some of the less expensive DiskStations use ARM type processors (see this link to determine the type of CPU installed in a specific DiskStation). It may be possible to produce a working version of Nagios on NAS devices that do not have Intel 32 bit or 64 bit processors (such as the DS212+), but I have not yet fully tested the procedure with many different NAS units. Note that the even though the DS415+ and DS1813+ both use Intel CPUs running a 64 bit DSM version, the installation steps are a bit different (I tried various unsuccessful approaches over the last two months, and finally found a working combination).
Warning: A lot of what follows is based on experimentation, with the end goal of having Nagios running on a Synology DiskStation having the ability to ping devices on the network or the Internet, with an email sent to an administrator when a device stops responding to ping requests, and to send a second email when the device resumes responding to ping requests. This functionality represents a small fraction of Nagios’ capabilities through the use of plugins (see my article that describes setting up the Oracle client on a Diskstation to permit Oracle Database monitoring). File paths vary from one Linux distribution to the next, so that adds a bit of challenge to make certain that the files are placed in the required directory. Copying a file to the wrong directory may temporarily disable the DiskStation and require the reinstallation of the Synology DSM operating system. The directions below are not final, and quite likely do not represent the most efficient approaches to accomplish the end goal (note that the steps are more efficient than those for the DS1813+ and DS412+) – but the directions will hopefully be “close enough to correct” to allow the average reader of this blog to ping and send email alerts from a DiskStation.
I have relied on the free Nagios network monitoring solution since 2002 to provide an early warning of problems associated with network attached equipment including servers, production floor computers, switches, printers, wireless access points, IP cameras, website accessibility, Internet connection stability, etc. While I rely on Nagios’ alerting system, I am not an expert at configuring the Nagios network monitoring system; the Nagios configuration documentation may be downloaded here.
First, make certain that the Telnet Service (or SSH Service if that is preferred) is enabled on the DiskStation. In the DiskStation’s Control Panel, click Terminal & SNMP.

Then put a checkmark next to Enable Telnet service, and click the Apply button.

Verify that the computer that you intend to use has a Telnet client. For Windows 7, access the Programs link in the Control Panel, and then click the Turn Windows features on or off link. Make certain that there is a checkmark next to Telnet Client, then click the OK button.

Open a command line (in Windows, Start – Run – type cmd and press the Enter key). On the command line, type telnet followed by either the name of the DiskStation or the IP address of the DiskStation, then press the Enter key. When prompted for a username, type root and press the Enter key. Type the admin user’s password (that is used to access the DSM interface in a web browser) and press the Enter key For example, if the DiskStation has an IP address of 192.168.1.55, the screen would appear similar to the following just before pressing the enter key:.

The command line on the DiskStation is very similar to the command line on a Unix or Linux computer, and is somewhat similar to a Windows command line or MS-DOS command line (use / rather than \, use ls rather than dir, use vi rather than edit):

—
We first need to add ipkg support to the DiskStation, detailed directions may be viewed at this link. The exact directions may be different for other DiskStation models, but the following directions work for the DS415+, DS1813+ and DS412+ (note that all files downloaded from the Internet will be placed on volume1 in a new downloads directory – copy and paste the lines to the Telnet session, one line at a time – simply right-click inside the telnet window to paste, if you are using Windows 7/8’s telnet client):
cd /volume1
mkdir downloads
cd downloads
wget http://ipkg.nslu2-linux.org/feeds/optware/syno-i686/cross/unstable/syno-i686-bootstrap_1.2-7_i686.xsh
chmod +x syno-i686-bootstrap_1.2-7_i686.xsh
sh syno-i686-bootstrap_1.2-7_i686.xsh
The vi editor is used on the DiskStation to modify files; that vi editor is a bit challenging to use at first sight, so you may need help with a couple of basic commands (see this quick reference for other commands). The commands in vi are case sensitive (i is not the same as I). When a file is opened, press the i key on the keyboard to allow making changes to the file (such as typing commands, or deleting commands). When finished making changes to the file press the Esc key. Once the Esc key is pressed, type ZZ to save the changed file and quit, or :q! to quit without saving the changes.
Next, we must modify the file that establishes the environment for the root user, when that user connects to the DiskStation. This change is needed as part of the ipkg installation. Edit the .profile file used by the root user:
vi /root/.profile
Press the i key to switch to insert mode, place a # character in front of the two lines that contain the word PATH, and save the file (press the Esc key then type ZZ):

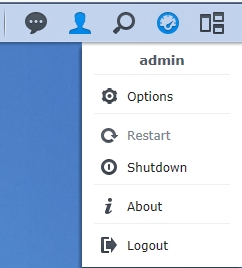
Reboot the DiskStation using the Synology interface by clicking the Options button (the head shaped icon) near the top-right, and then click Restart and confirm that the DiskStation should be restarted:
Once the Synology reboots, reconnect a telnet session to the Synology. Update ipkg support and install some ipkg items that will be either directly used by Nagios, or during the installation of Nagios. When installing the optware-devel package, an error may appear stating that there is an incompatibility between wget and wget-ssl – simply ignore that error. An error will also appear when installing Apache – that problem will be fixed in the step that follows.
ipkg update
ipkg list
ipkg update wget-ssl
ipkg install optware-devel
ipkg install gcc
ipkg install libtool
ipkg install MySQL
ipkg install openssl
ipkg install openssl-dev
ipkg install sendmail
ipkg install inetutils
ipkg install apache
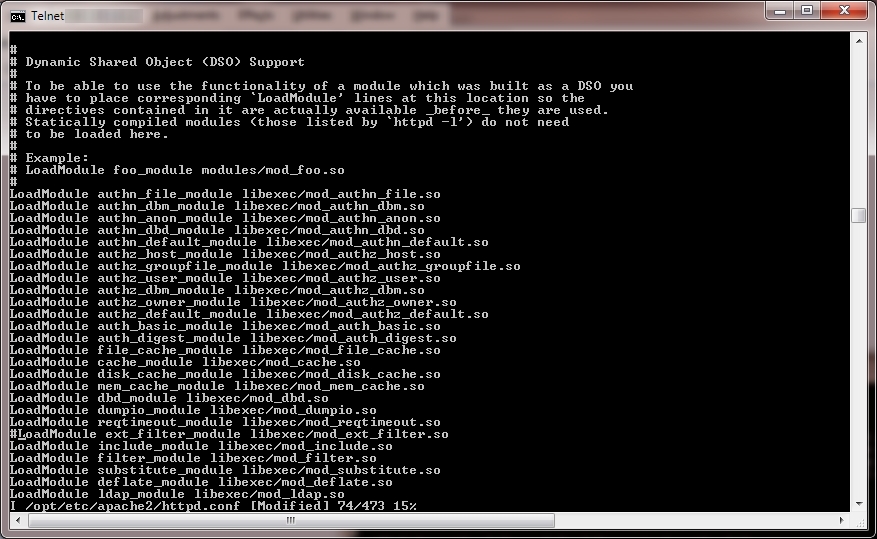
The ipkg install apache command will likely result in an error related to ext_filter_module. Edit /opt/etc/apache2/httpd.conf using vi, and put a # character in front of the line LoadModule ext_filter_module libexec/mod_ext_filter.so :
Save the file, and re-execute the ipkg install apache command.
ipkg install apache
Download the compilers for the Avoton CPU, which is installed in the DS415+ (the second compiler downloaded below will be used with the Nagios install – the first compiler typically resulted in errors (ex: ../lib/libnagios.a: could not read symbols: Archive has no index; run ranlib to add one) when compiling the Nagios program):
cd /volume1/downloads
wget http://sourceforge.net/projects/dsgpl/files/DSM%205.1%20Tool%20Chains/Intel%20x86%20Linux%203.2.40%20%28Avoton%29/gcc473_glibc217_x86_64_avoton-GPL.tgz
tar zxpf gcc473_glibc217_x86_64_avoton-GPL.tgz -C /usr/local/
wget http://sourceforge.net/projects/dsgpl/files/DSM%205.1%20Tool%20Chains/Intel%20x86%20Linux%203.2.40%20%28Avoton%29/gcc463_glibc213_i686_avoton-GPL.tgz
tar zxpf gcc463_glibc213_i686_avoton-GPL.tgz -C /usr/local/
The above command will create two directory structures named x86_64-pc-linux-gnu and i686-pc-linux-gnu in the /usr/local directory. Edit the .profile file to remove the # character that was earlier added in front of the lines containing the word PATH, save the file, then reboot the Synology (see the earlier provided screen captures for the lines that need to be modified, and the process for rebooting the Synology):
vi /root/.profile
Reconnect to the DiskStation using Telnet after the Synology reboots, and compile libltdl – note that the PATH modification below seems to be necessary to avoid an ldconfig: command not found error or a message about Perl not being found:
PATH=$PATH:/opt/bin/
cd /opt/share/libtool/libltdl/
env CC=/usr/local/i686-pc-linux-gnu/bin/i686-pc-linux-gnu-gcc \
LD=/usr/local/i686-pc-linux-gnu/bin/i686-pc-linux-gnu-ld \
RANLIB=/usr/local/i686-pc-linux-gnu/bin/i686-pc-linux-gnu-ranlib \
CFLAGS="-I/usr/local/i686-pc-linux-gnu/include" \
LDFLAGS="-L/usr/local/i686-pc-linux-gnu/lib" \
./configure --host=i686-pc-linux-gnu --target=i686-pc-linux-gnu --build=i686-pc-linux-gnu -–prefix=/opt

make all
make install
Note that the following message may appear later when we attempt to verify that Nagios compiled correctly:
/opt/bin/nagios: error while loading shared libraries: libltdl.so.3: cannot open shared object file: No such file or directory
To avoid that error, execute the following commands to copy a couple of files to the correct locations (if the files do not already exist in those locations):
cp /opt/lib/libltdl.so.3 /opt/local/lib/libltdl.so.3
cp /opt/lib/libltdl.so.3 /usr/lib/libltdl.so.3
cp /opt/lib/libltdl.so /usr/lib/libltdl.so
Using the DiskStation’s Control Panel, click Group, and create a nagios group – the group does not require any special DiskStation permissions.

Using the DiskStation’s Control Panel, click User and create a nagios user and add that user to the nagios group. The nagios user does not require any specific DiskStation permissions.
Next, switch back to the telnet session, download the Nagios source code, and compile the source code (note that if a mistake is made, and the nagios-4.0.8 directory must be removed, change to the /volume1/downloads directory and use this command to remove the directory, then re-execite the tar command: rm -rf nagios-4.0.8 ):
cd /volume1/downloads
wget http://sourceforge.net/projects/nagios/files/nagios-4.x/nagios-4.0.8/nagios-4.0.8.tar.gz
tar xzf nagios-4.0.8.tar.gz
cd nagios-4.0.8

env CC=/usr/local/i686-pc-linux-gnu/bin/i686-pc-linux-gnu-gcc \
LD=/usr/local/i686-pc-linux-gnu/bin/i686-pc-linux-gnu-ld \
RANLIB=/usr/local/i686-pc-linux-gnu/bin/i686-pc-linux-gnu-ranlib \
CFLAGS="-I/usr/local/i686-pc-linux-gnu/include" \
LDFLAGS="-L/usr/local/i686-pc-linux-gnu/lib" \
./configure --host=i686-pc-linux-gnu --target=i686-pc-linux-gnu --build=i686-pc-linux-gnu -–prefix=/opt --with-command-group=nagios

make all
make install
make install-init
make install-config
make install-commandmode
Try running the Nagios verify command by executing the command on the following line (a Segmentation fault (core dumped) error message is bad news, which may indicate that the wrong compiler was used):
/opt/bin/nagios -v /opt/etc/nagios.cfg
If the compile process worked correctly, the telnet session should appear similar to below when the above verify command is executed:

If the above command was successful, copy the Nagios startup script to the correct location so that Nagios will automatically start when the DiskStation is rebooted:
cp /usr/local/etc/rc.d/nagios /opt/etc/init.d/S81nagios
Verify that the ownership of the nagios directory is set correctly:
chown nagios:nagios /opt/bin/nagios -R
In addition to the main /opt/etc/nagios.cfg Nagios file, there are several other configuration files that are potentially used by Nagios (defined in the nagios.cfg file) – we will take a look at those files later:
/opt/etc/objects/commands.cfg
/opt/etc/objects/contacts.cfg
/opt/etc/objects/timeperiods.cfg
/opt/etc/objects/templates.cfg
/opt/etc/objects/localhost.cfg
/opt/etc/objects/windows.cfg
/opt/etc/objects/server.cfg
/opt/etc/objects/switch.cfg
/opt/etc/objects/printer.cfg
We need to make a couple of adjustments in the /opt/etc/objects/commands.cfg file.
vi /opt/etc/objects/commands.cfg
Change the ‘notify-host-by-email’ command definition section as follows:
define command{
    command_name notify-host-by-email
    command_line /usr/bin/printf "%b" "Subject: $NOTIFICATIONTYPE$ Host Alert: $HOSTNAME$ is $HOSTSTATE$\n\n***** Nagios *****\n\nNotification Type: $NOTIFICATIONTYPE$\nHost: $HOSTNAME$\nState: $HOSTSTATE$\nAddress: $HOSTADDRESS$\nInfo: $HOSTOUTPUT$\n\nDate/Time: $LONGDATETIME$\n" | /opt/sbin/sendmail -vt $CONTACTEMAIL$
    }
Change the ‘notify-service-by-email’ command definition section as follows:
define command{
    command_name notify-service-by-email
    command_line /usr/bin/printf "%b" "Subject: $NOTIFICATIONTYPE$ Service Alert: $HOSTALIAS$/$SERVICEDESC$ is $SERVICESTATE$\n\n***** Nagios *****\n\nNotification Type: $NOTIFICATIONTYPE$\n\nService: $SERVICEDESC$\nHost: $HOSTALIAS$\nAddress: $HOSTADDRESS$\nState: $SERVICESTATE$\n\nDate/Time: $LONGDATETIME$\n\nAdditional Info:\n\n$SERVICEOUTPUT$\n" | /opt/sbin/sendmail -vt $CONTACTEMAIL$
    }
Change the ‘check_ping’ command definition section as follows (feel free to read the documentation for check_ping and specify different values):
define command{
        command_name    check_ping
        command_line    $USER1$/check_ping -H $HOSTADDRESS$ -w 3000,25% -c 5000,90% -p 3
        }
Save the file and exit vi.
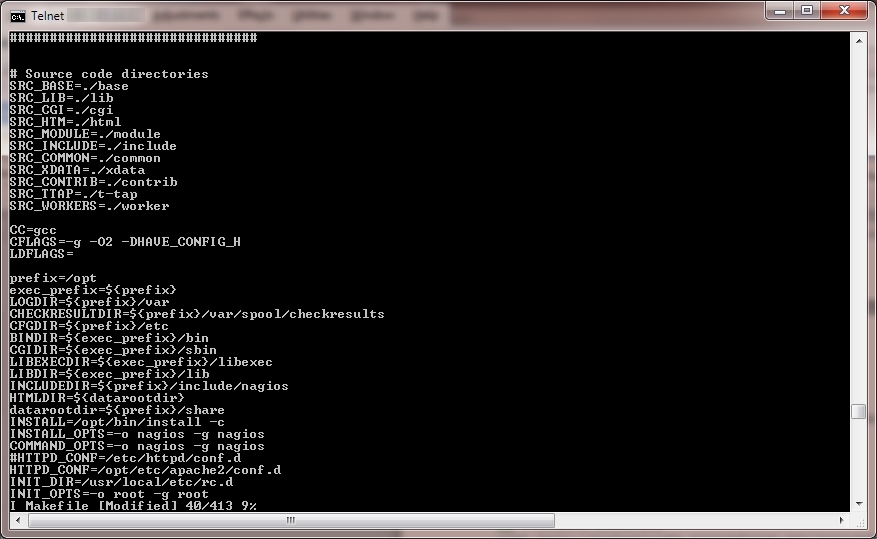
(This part still needs some fine tuning to make the web interface work with Nagios.) Edit the Nagios Makefile and change the line beginning with HTTPD_CONF to show HTTPD_CONF=/opt/etc/apache2/conf.d Then save the file.
cd /volume1/downloads/nagios-4.0.8
vi Makefile
Execute the following command:
make install-webconf
Create a nagiosadmin user for the web administration, and specify a password when prompted (edit: January 11, 2015: the file location specified by the command below is incorrect if you plan to use the Nagios monitoring web pages – if you intend to use the Nagios monitoring web pages, execute the command as shown below, and we will later recreate the file in the correct location):
htpasswd -c /usr/local/etc/htpasswd.users nagiosadmin
—
Next, we need to start setting up the plugins for Nagios. First the net-snmp source code is downloaded and extracted:
cd /volume1/downloads
wget http://sourceforge.net/projects/net-snmp/files/net-snmp/5.7.2/net-snmp-5.7.2.tar.gz
tar xzf net-snmp-5.7.2.tar.gz
cd net-snmp-5.7.2
Execute the following to compile the net-snmp source (note that this command uses the second compiler that was downloaded):
env CC=/usr/local/i686-pc-linux-gnu/bin/i686-pc-linux-gnu-gcc \
LD=/usr/local/i686-pc-linux-gnu/bin/i686-pc-linux-gnu-ld \
RANLIB=/usr/local/i686-pc-linux-gnu/bin/i686-pc-linux-gnu-ranlib \
CFLAGS="-I/usr/local/i686-pc-linux-gnu/include" \
LDFLAGS="-L/usr/local/i686-pc-linux-gnu/lib" \
./configure --host=i686-pc-linux-gnu --target=i686-pc-linux-gnu --build=i686-pc-linux-gnu -–prefix=/opt
Several prompts will appear on the screen when the command is executed. I entered the following for the prompts:
Default version of SNMP to use (3): 3
System Contact Information: (Enter)
System Location (Unknown): (Enter)
Location to write logfile (/var/log/snmpd.log): /opt/var/snmpd.log
Location to write persistent information (/var/net-snmp): (Enter)
Two additional commands to execute:
make -i
make install -i
Now we need to download the source code for the Nagios plugins (check_apt, check_breeze, check_by_ssh, check_clamd, check_cluster, check_dhcp, check_disk, check_disk_smb, check_dns, check_dummy, check_file_age, check_flexlm, check_ftp, check_http, check_icmp, check_ide_smart, check_ifoperstatup, check_ifstatus, check_imap, check_ircd, check_jabber, check_ldap, check_ldaps, check_load, check_log, check_mailq, check_mrtg, check_mrtgtraf, check_mysql, check_mysql_query, check_nagios, check_nntp, check_nntps, check_nt, check_ntp, check_ntp_peer, check_ntp_time, check_nwstat, check_oracle, check_overcr, check_ping, check_pop, check_procs, check_real, check_rpc, check_sensors, check_simap, check_smtp, check_snmp, check_spop, check_ssh, check_ssmtp, check_swap, check_tcp, check_time, check_udp, check_ups, check_users, check_wave) that allow Nagios to perform various monitoring tasks:
cd /volume1/downloads
wget https://www.nagios-plugins.org/download/nagios-plugins-2.0.3.tar.gz
tar xzf nagios-plugins-2.0.3.tar.gz
cd nagios-plugins-2.0.3
PATH=$PATH:/opt/bin/
Now compile the Nagios plugins:
env CC=/usr/local/i686-pc-linux-gnu/bin/i686-pc-linux-gnu-gcc \
LD=/usr/local/i686-pc-linux-gnu/bin/i686-pc-linux-gnu-ld \
RANLIB=/usr/local/i686-pc-linux-gnu/bin/i686-pc-linux-gnu-ranlib \
CFLAGS="-I/usr/local/i686-pc-linux-gnu/include" \
LDFLAGS="-L/usr/local/i686-pc-linux-gnu/lib" \
./configure --with-openssl=/usr/syno/bin/openssl --with-nagios-user=nagios --with-nagios-group=nagios --with-ping-command="/opt/bin/ping -c %d %s" --psdir=/bin --with-ps-varlist="&procpid,&procppid,&procvsz,&procrss,procprog,&pos" --with-ps-cols=6 --with-ps-format="%d %d %d %d %s %n" --with-ps-command="/bin/ps -w"  --host=i686-pc-linux-gnu --target=i686-pc-linux-gnu --build=i686-pc-linux-gnu -–prefix=/opt

make -i
make install -i
At this point, the Nagios network monitoring utility will likely experience an error similar to the following when attempting to send an alert email:
output=collect: Cannot write ./dfr6BFFPC7027203 (bfcommit, uid=1026, gid=25): Permission denied
Execute the following commands, which should fix the above problem:
chmod g+w /opt/var/spool/clientmqueue
chmod 444 /opt/etc/mail/*.cf
chmod 7555 /opt/sbin/sendmail
We will need to use su to test the execution of various commands as the nagios user. Without the following fix (described here), you might see the following error message when attempting to execute a command as the nagios user:
su: warning: cannot change directory to /var/services/homes/nagios: No such file or directory su: /sbin/nologin: No such file or directory
Enter the following commands:
mkdir /var/services/homes
mkdir /var/services/homes/nagios
chown nagios:nagios /var/services/homes/nagios -R
vi /etc/passwd
Locate the line in the passwd file for the Nagios user. Near the end of the line, /sbin/nologin should appear. Replace that text with /bin/ash then save and exit vi.
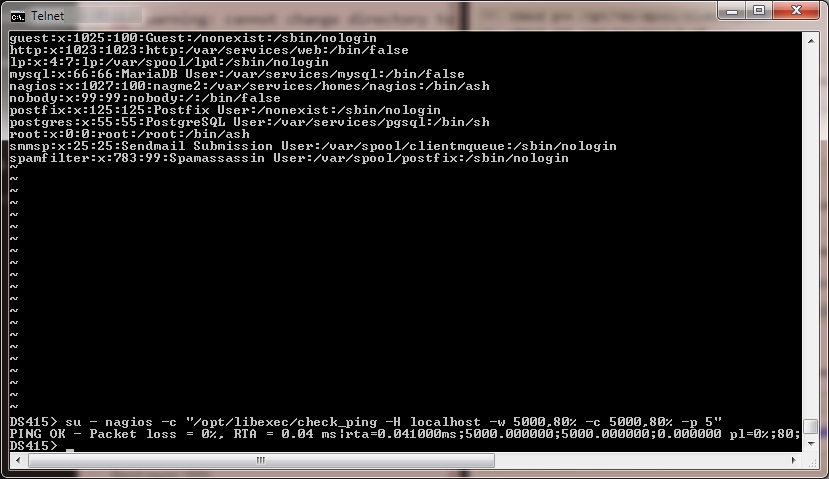
Verify that the Nagios user is able to execute the check_ping plugin. Replace MyDeviceHere with either an IP address or a network device name (such as localhost) that is on your network:
su - nagios -c "/opt/libexec/check_ping -H MyDeviceHere -w 5000,80% -c 5000,80% -p 5"
If there were no problems, then something similar to the following should appear (a Segmentation fault (core dumped) error message is bad news, which may indicate that the wrong compiler was used):
—
If the ping command (called by check_ping) is not able to resolve a network device name, and the fully qualified DNS name was not specified (MyDeviceHere.MyDomainHere.com), edit the /etc/resolv.conf file:
vi /etc/resolv.conf
On a new line in the file, add the following line (replacing MyDomainHere.com with your DNS domain name for the network):
search MyDomainHere.com
—
Verify that sendmail works for the Nagios user. At the prompt that appears, type a short message, press the Enter key, type a period, then press the Enter key again – replace MyEmailAddressHere@MyDomainHere.com with your email address):
su - nagios -c "/opt/sbin/sendmail -vt MyEmailAddressHere@MyDomainHere.com"
If you see the following message, then there are two problems:
/opt/etc/mail/sendmail.cf: line 73: fileclass: cannot open '/opt/etc/mail/local-host-names': Group writable directory
WARNING: local host name (DS415) is not qualified; see cf/README: WHO AM I?
To fix the second problem (the warning), edit the /etc/hosts file using vi. Locate the line with the Synology’s IP address and the Synology’s name (for example DS415). Between those two entries add the Synology’s name followed by a period and the domain name. For example, the line may look like the following once edited. Save the file and exit vi:
192.168.1.55 DS415.MyDomainHere.com DS415
To fix the “cannot open… Group writable directory” error, try the following (note that it is possible that only the first line is necessary, so try the sendmail test ago after executing just the first line below):
chmod 555 /opt/etc
chmod 755 /opt/etc/mail
chmod 444 /opt/etc/mail/local-host-names
Then repeat the email test by executing:
su - nagios -c "/opt/sbin/sendmail -vt MyEmailAddressHere@MyDomainHere.com"
—-
As a general tip, it is important to always verify the Nagios configuration before starting (or restarting after a configuration change) Nagios. To verify the Nagios configuration type the following:
/opt/bin/nagios -v /opt/etc/nagios.cfg
Once the monitoring target devices are defined, it is possible to start Nagios as a background task (daemon) by executing the following:
/opt/bin/nagios -d /opt/etc/nagios.cfg
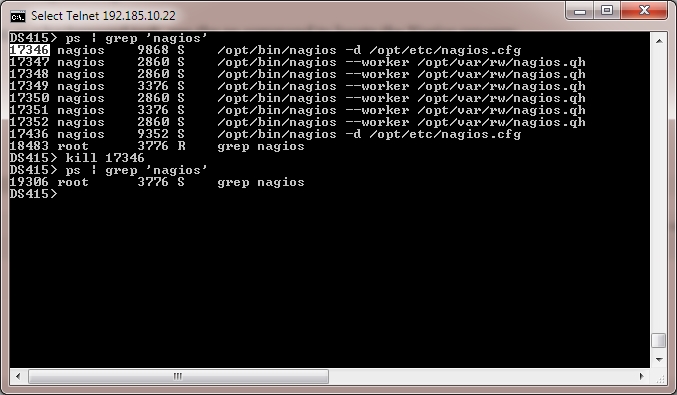
To stop Nagios that is executing as a background task, use the ps command to locate the Nagios process, find the lowest process ID (PID) for the line that includes nagios.cfg (17346 in this case), then kill the process that is associated with that PID:
ps | grep 'nagios'
—
At this point, Nagios will hopefully run as a background task, and it should be able to ping and send email alerts. However, if you were following the above directions, we have not yet instructed Nagios which devices to monitor, and to whom the alert emails should be sent. The next step is to define the email contacts by modifying the /opt/etc/objects/contacts.cfg file (see the documentation for assistance):
vi /opt/etc/objects/contacts.cfg
After setting up the contacts, we should probably tell Nagios which devices to monitor. If there are a lot of devices on your network to be monitored, you might find that using Microsoft Excel rather than vi to create the object definitions makes the task more manageable. See the previous article for the steps to use Microsoft Excel.
If you decided to use some of the non-standard Nagios group names (as I did), those non-standard group names must be defined in the /opt/etc/objects/templates.cfg file:
vi /opt/etc/objects/templates.cfg
A portion of the additional entries that I made in this file include the following:
define host{
       name                    ap      ; The name of this host template
       use                     generic-host    ; Inherit default values from the generic-host temp
       check_period            24x7            ; By default, access points are monitored round t
       check_interval          5               ; Actively check the access point every 5 minutes
       retry_interval          1               ; Schedule host check retries at 1 minute intervals
       max_check_attempts      10              ; Check each access point 10 times (max)
       check_command           check_ping      ; Default command to check if access points are "alive"
       notification_period     24x7            ; Send notification out at any time - day or night
       notification_interval   30              ; Resend notifications every 30 minutes
       notification_options    d,r             ; Only send notifications for specific host states
       contact_groups          admins          ; Notifications get sent to the admins by default
       hostgroups              ap ; Host groups that access points should be a member of
       register                0               ; DONT REGISTER THIS - ITS JUST A TEMPLATE
       }

define host{
       name                    camera  ; The name of this host template
       use                     generic-host    ; Inherit default values from the generic-host temp
       check_period            24x7            ; By default, cameras are monitored round t
       check_interval          60              ; Actively check the device every 60 minutes
       retry_interval          1               ; Schedule host check retries at 1 minute intervals
       max_check_attempts      10              ; Check each device 10 times (max)
       check_command           check_ping      ; Default command to check if device are "alive"
       notification_period     24x7            ; Send notification out at any time - day or night
       notification_interval   240             ; Resend notifications every 240 minutes
       notification_options    d,r             ; Only send notifications for specific host states
       contact_groups          admins          ; Notifications get sent to the admins by default
       hostgroups              camera ; Host groups that cameras should be a member of
       register                0               ; DONT REGISTER THIS - ITS JUST A TEMPLATE
       }
Nagios will not know that it should read the additional configuration files until it is told to do so by modifying the /opt/etc/nagios.cfg file.
vi /opt/etc/nagios.cfg
If you have selected to use any of the custom files that were created based on my previous article, instruct Nagios to read the associated file by adding entries to the nagios.cfg file:
# Charles Hooper's object types
cfg_file=/opt/etc/objects/ap.cfg
cfg_file=/opt/etc/objects/camera.cfg
cfg_file=/opt/etc/objects/computer.cfg
cfg_file=/opt/etc/objects/external.cfg
cfg_file=/opt/etc/objects/other.cfg
cfg_file=/opt/etc/objects/printer.cfg
cfg_file=/opt/etc/objects/server.cfg
cfg_file=/opt/etc/objects/switch.cfg
A large number of changes were likely made to the Nagios configuration files, so it is important to verify that there are no errors in the configuration:
/opt/bin/nagios -v /opt/etc/nagios.cfg
If no errors are found in the configuration, terminate (kill) nagios and then restart Nagios as described above.
—-
(Added January 11, 2015)
While trying to find a way to allow the Nagios status web pages to work on the DS415+, I discovered that Nagios was not running in daemon mode once I had made entries into the various configuration files to specify the devices to be monitored. Taking a look at my previous article, I quickly found the solution for the daemon mode problem. In a telnet session enter the following:
mkdir /opt/var/nagios
mkdir /opt/var/nagios/archives
mkdir /opt/var/nagios/spool
mkdir /opt/var/nagios/spool/checkresults
mkdir /opt/var/nagios/rw/
chown nagios:nagios /opt/var/nagios -R
chmod g+rwx /opt/var/nagios/rw
chmod g+s /opt/var/nagios/rw
vi /opt/etc/nagios.cfg
In the nagios.cfg file, I made the following changes:
log_file=/opt/var/nagios/nagios.log
object_cache_file=/opt/var/nagios/objects.cache
precached_object_file=/opt/var/nagios/objects.precache
status_file=/opt/var/nagios/status.dat
command_file=/opt/var/nagios/rw/nagios.cmd
lock_file=/opt/var/nagios/nagios.lock
temp_file=/opt/var/nagios/nagios.tmp
log_archive_path=/opt/var/nagios/archives
check_result_path=/opt/var/nagios/spool/checkresults
state_retention_file=/opt/var/nagios/retention.dat
debug_file=/opt/var/nagios/nagios.debug
Save and exit vi. If the Nagios daemon is running in the background, find the process and kill it (replace 24532 with the process ID of the first line that contains /opt/bin/nagios -d /opt/etc/nagios.cfg):
ps | grep 'nagios'
kill 24532
Verify the Nagios configuration, and if there were no problems, then start Nagios in daemon mode:
/opt/bin/nagios -v /opt/etc/nagios.cfg
/opt/bin/nagios -d /opt/etc/nagios.cfg
Check the Nagios log file for problems, displaying just the last 100 lines:
tail -n 100 /opt/var/nagios/nagios.log
—
I never bothered to determine how to make the Nagios monitoring status web pages work with the Synology DS412+, DS1813+, and DS212+. I thought that I would see what steps would be required to make that functionality work on a Synology DS415+ (note that the following steps may work exactly the same on the Synology DS412+, DS1813+, and DS212+). The Synology DSM operating system utilizes port 5000 for web traffic. If you add the WordPress package to the Synology, that package uses the standard port 80 for web traffic. If you followed the above steps for installing Nagios, you installed a second copy of the Apache web server on the Synology that uses port 8000 for web traffic. If your Synology has an IP address of 192.168.1.60, then you would use the following website address to access the second web server on the Synology: http://192.168.1.60:8000/nagios/
The Nagios monitoring status web pages, once set up, will appear as a directory of that second web server, as shown below:

The value of the Nagios monitoring status web pages becomes apparent fairly quickly by reviewing the above screen capture. The above Tactical Overview shows that there are 18 monitored devices that are up, one monitored device that is down, and another device that is in the process of being checked. The links at the left provide additional information about the monitored devices. Let’s configure the second copy of Apache on the Synology to support the Nagios monitoring status web pages.
The second copy of Apache uses the configuration file /opt/etc/apache2/httpd.conf. Edit that file:
vi /opt/etc/apache2/httpd.conf
Add the following directly below the # Supplemental configuration heading, which is near the end of the file:
# Added by per Charles Hooper's Nagios installation guide for Synology DS415+
Include etc/apache2/conf.d/nagios.conf
Include etc/apache2/conf.d/php.conf
Save the file and exit vi. Next, we need to create the htpasswd.users file in the correct location. In the above steps, we executed the following command:
/opt/sbin/htpasswd -c /usr/local/etc/htpasswd.users nagiosadmin
That htpasswd.users file is expected to be in the /opt/etc directory. Execute the following command to create the file in the correct directory (you will be prompted for a password for the nagiosadmin user):
/opt/sbin/htpasswd -c /opt/etc/htpasswd.users nagiosadmin
The Nagios monitoring status web pages require PHP support to be added to the second Apache installation. Execute the following commands to install PHP:
/opt/bin/ipkg update
/opt/bin/ipkg list
/opt/bin/ipkg install php
/opt/bin/ipkg install php-apache
Next, we need to modify the /opt/etc/apache2/conf.d/nagios.conf file that was created during the Nagios installation.
vi /opt/etc/apache2/conf.d/nagios.conf
Below the heading <Directory “/opt/share”> add the following line:
DirectoryIndex index.php
Save the file and exit vi. Next, we need to adjust the php.ini file on the Synology:
vi /opt/etc/php.ini
In the file (near line 108), locate the following line:
output_buffering = Off
Change that line to show:
output_buffering = 8192
Locate the following line (near line 248) in the file:
memory_limit = 8M
Change that line to show:
memory_limit = 128M
There may be a second php.ini file located in the /etc/php directory, make the same change to that file, then save the file and exit vi:
vi /etc/php/php.ini
Perform a graceful restart of the second copy of Apache:
/opt/sbin/apachectl -k graceful
Try to access the Nagios status monitoring pages in a web browser (replace 192.168.1.60 with the IP address of your Synology) http://192.168.1.60:8000/nagios/
You should be prompted to enter a username and password. Enter nagiosadmin for the username, and enter the password for that user that you created when executing the /opt/sbin/htpasswd command earlier. If the web page does not display, take a look at the last 100 lines of the Apache error log to see if any clues are provided:
tail -n 100 /opt/var/apache2/log/error_log
Some of the interesting error messages that I experienced including the following:
[Sun Jan 04 14:07:55 2015] [error] [client 192.168.1.218] (2)No such file or directory: Could not open password file: /opt/etc/htpasswd.users

[Sun Jan 04 14:23:04 2015] [error] [client 192.168.1.218] Directory index forbidden by Options directive: /opt/share/

[Sun Jan 04 15:07:09 2015] [error] [client 192.168.1.218] File does not exist: /opt/share/<, referer: http://192.168.1.60:8000/nagios/

[Sun Jan 04 17:53:06 2015] [notice] child pid 15126 exit signal Segmentation fault (11)

[Sun Jan 11 09:41:57 2015] [error] [client 192.168.1.213] script not found or unable to stat: /opt/sbin/statusmap.cgi, referer: http://192.168.1.60:8000/nagios/side.php
The last of the above errors still remains, the file /opt/sbin/statusmap.cgi does not exist. For now, I will let someone else find a solution for that problem.
If you find that a monitored device is down, using the web interface it is possible to disable future checking of the device, as well as alter a number of other notification options. Unfortunately, clicking any of the options under the Host Commands heading will result in a permission error.

To fix the permission error:
Using the Synology Control Panel interface, create a new group named www – this group requires no specific Synology permissions. Next, using the Synology Control Panel interface, create a user named apache – make this user a member of the nagios, users, and www groups. This user requires no specific Synology permissions. Then change the username and group under which Apache executes:
vi /opt/etc/apache2/httpd.conf
In the httpd.conf file, locate the following two lines:
User nobody
Group #-1
Change those lines to appears as follows:
User apache
Group www
Save the file and exit vi. Gracefully restart the second copy of Apache:
/opt/sbin/apachectl -k graceful
Refresh the Nagios monitoring status web page – the options under the Host Commands heading should no longer return an error.
—-
Adding Plex Support (Added December 29, 2014)
Note: Some of these steps may use utilities that were installed during the Nagios install. Plex does not yet support the CPU type in the DS415+, so it is necessary to modify a configuration file during the install. (Note May 25, 2015: The Plex download version 0.9.12.1.1079 natively supports the DS415+’s CPU, so after downloading the file it is possible to skip to adjusting the Trust Level setting step in the Synology Package Center.)
Connect to the DS415+ using a telnet session and the root username and password (see the directions above, if the steps are not clear). Change to the downloads directory that was created above, and use the wget command to download what is as of today the current version of Plex:
cd /volume1/downloads/
wget https://downloads.plex.tv/plex-media-server/0.9.11.7.803-87d0708/PlexMediaServer-0.9.11.7.803-87d0708-x86.spk
Create a directory, extract the downloaded PlexMediaServer-0.9.11.7.803-87d0708-x86.spk file to the just created directory, then switch to that directory:
mkdir PlexMediaServer-0.9.11.7.803-87d0708-x86
tar -xvf PlexMediaServer-0.9.11.7.803-87d0708-x86.spk -C /volume1/downloads/PlexMediaServer-0.9.11.7.803-87d0708-x86
cd PlexMediaServer-0.9.11.7.803-87d0708-x86
Next, we need to edit the INFO file to add support for the CPU that is installed in the DS415+:
vi INFO
If you are not familiar with using vi to edit files, you will need to switch vi to edit mode by typing i on the keyboard (note that is a lowercase i) before attempting to make any changes to the file. When you are finished making changes, press the Esc key on the keyboard, then type ZZ to save and exit (note that is uppercase ZZ).
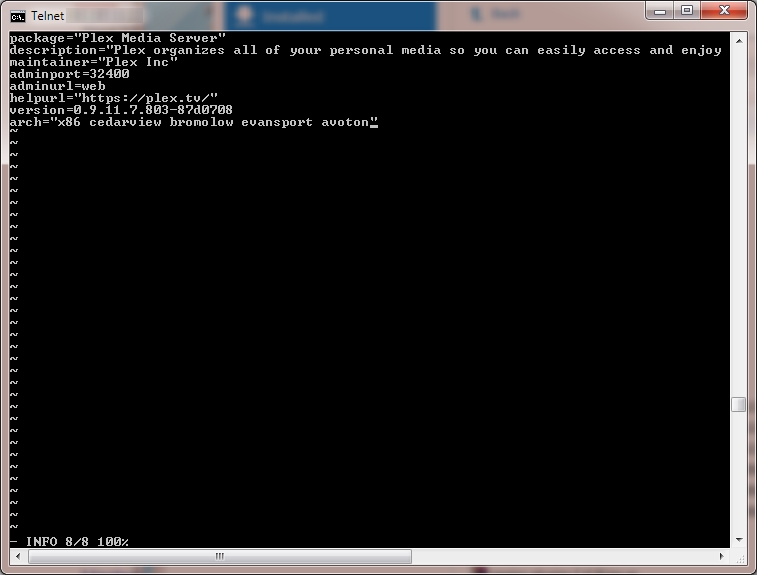
In the file, change the line:
arch="x86 cedarview bromolow evansport"
to:
arch="x86 cedarview bromolow evansport avoton"
When finished with the edit, the file should appear as below. Save the file and exit vi.
Next, we need to create a new spk file that includes the modified INFO file, and copy that file to a shared folder (mysharedfolder in this example) that was previously created on the DS415+ that is accessible from a computer that has access to the DS415+’s DSM interface.
tar -cvf /volume1/downloads/PlexMediaServerMod-0.9.11.7.803-87d0708-x86.spk *
cd ..
cp PlexMediaServerMod-0.9.11.7.803-87d0708-x86.spk /volume1/mysharedfolder/PlexMediaServerMod-0.9.11.7.803-87d0708-x86.spk
Now on the computer that has access to the DS415+’s DSM interface, click Package Center, then click Settings. Under the Trust Level heading, change the setting from Synology Inc. to “Any publisher“, then click OK.

Next, install Plex using the Manual Install feature. Click the Manual Install button, then click the Browse button. Switch to the shared folder where the spk file was copied (mysharedfolder in the above example), and select to open the PlexMediaServerMod-0.9.11.7.803-87d0708-x86.spk file. Click the Next button to complete the install of Plex.

I have only just started experimenting with Plex, so I do not have a full grasp of its capabilities yet. There are several “channels” that can be added to watch certain types of recorded video. After experimenting with a couple of the easily accessible channels, I stumbled across this page, which described how to add several additional “unsupported” channels. The following steps seem to work to install the additional channels from a telnet session connected to the DS415+. Download and extract the unsupported channels:
cd /volume1/downloads/
wget https://dl.dropboxusercontent.com/u/15227710/UnSupportedAppstore.bundle.zip
mkdir plexunsupported
unzip UnSupportedAppstore.bundle.zip -d ./plexunsupported/
Change to the directory where the Plex plugins are stored, create a directory for the new plugin that was just downloaded and extracted, copy the downloaded plugin files to the directory that was just created, then change the ownership of the downloaded and extracted files to the plex user:
cd /volume1/Plex/Library/Application\ Support/Plex\ Media\ Server/Plug-ins/
mkdir UnSupportedAppstore.bundle
cp -r /volume1/downloads/plexunsupported/UnSupportedAppstore.bundle/* ./UnSupportedAppstore.bundle
chown -R plex:users ./UnSupportedAppstore.bundle
As far as I could determine, the unsupported channels will only appear when the Plex package is stopped and then started again. In the Package Center’s Installed list click Plex Media Server. Click the down arrow to the right of Action, then click Stop. Wait 30 seconds, then click the down arrow again and select Run.

If the DS415+ is named ds415, the it should be possible to access Plex on the Synology using this link http://ds415:32400/web/index.html (replace ds415 with the unit’s IP address if the unit’s network name is not known). Clicking the Channels link at the left should show the Unsupported AppStore (the black icon below with the white border)

Clicking the Unsupported AppStore icon should then display a list of categories at the left. The New category contains quite a few channels, as shown below. To add the channel, click the channel, then click the Install link.

I am sure that there is much more to Plex than just offering an alternative to a Roku player or the streaming video options of some Blu-Ray players and network capable TVs (which are also able to retrieve the channels from Plex), but I have not had much time to experiment yet. I understand that Plex is very good at transcoding video streams for different media consumption devices, such as tablets, but I am not sure that I have a use for that functionality yet.
—-
Plex/Nagios/Wordpress Stress Test (Added April 5, 2014)
A question was asked on the Synology forums whether or not I had any evidence that replacing the pre-installed 2GB of memory with an 8GB Crucial memory card made a measurable difference in the Synology DS415+’s performance. That is a very difficult question to answer – the answer will depend largely on how the DS415+ is used. If the DiskStation is only used to receive 10+ GB files from a single client, the additional memory probably will make no difference in the performance of the DS415+.
When the DS415+ was first released there were several discussion threads on the Synology forums indicating that the Synology DS415+ was not powerful enough to handle 1080p video for clients wishing to play back that video on various streaming devices, while the less powerful DS415Play could support 1080P playback for clients because it had additional coprocessors to support video transcoding. So, I thought that I would try a quick test with the DS415+. The DS415+ is running Nagios to monitor several devices, including 15+ high definition security cameras, as well as acting as the FTP target for those security cameras. The DS415+ is also running WordPress, although WordPress has not seen much action lately on the unit. Plex is occasionally used on the DS415+, but had not been used in the last 10 to 12 hours. The DS415+ with 8 GB of memory installed showed the following memory statistics in its Resource Monitor: Reserved: 217.6 MB, Used: 741.9 MB, Buffer: 151.7 MB, Cached: 6.8 GB, Free: 166.5 MB. So, most of the additional 6 GB of memory was used for file caching, which helps speed up the apparent write speed of files, and the read speed of frequently accessed files.
So, I opened the WordPress website on the DS415+ and viewed a couple of pages. I then went to the Plex website hosted on the DS415+ using a Window 8.1 tablet and requested the playback of a 1080P movie – the tablet supports 1080P video. The DS415+ still had a bit of CPU capacity left, and the video was playing back smoothly on the tablet. Just for fun I then used a Sony Blu-Ray player to request a different 1080P movie from the DS415+ while the first movie was still streaming to the tablet. Below is a screen capture of a portion of the DSM interface on the DS415+ while both video streams were playing back (with occasional buffering):

I still cannot say for certain if the additional memory helped in this particular stress test. However, for the current cost of the 8GB memory card ($55 USD), the additional memory could prove to be helpful depending on how the DS415+ is used – all that it would take in this case is for a WordPress cache optimizer to consume 400 MB of additional memory to push the DS415+ over 2 GB of total memory consumption.
July 19, 2013 (Modified July 27, 2013, July 28, 2013, November 19, 2013)
(Forward to the Next Post in the Series)
—-
Update July 27, 2013:
- I now have Nagios running on an ARM based Synology DiskStation DS212+. Most of the steps are the same as outlined below, however there are a few additional errors that must be addressed (see below additional steps).
- All of the ./configure commands should have included –prefix=/opt (rather than –prefix=/usr/local or completely omitting that parameter). That change eliminates the need to copy the Nagios plugins to the correct location. Possibly related, the -i parameter was unnecessary for the snmp and Nagios plugins make and make install commands when the ./configure command included the –prefix=/opt prefix.
- The wget http://sourceforge.net/projects/dsgpl/files/DSM%204.1%20Tool%20Chains/Intel%20×86%20Linux%203.2.11… download step for the gcc compiler is apparently unnecessary, at least on the Synology DiskStation DS212+ (see below).
—-
This article describes how to compile and run Nagios on a Synology DiskStation DS1813+ (64 bit) or Synology DiskStation DS412+ (32 bit, the 32 bit steps should also apply to the DS1812+) NAS, both of which utilize Intel Atom processors (cat /proc/cpuinfo indicates that the DS412+ is using a 2.13GHz Atom D2700, while the DS1813+ is using a 2.13GHz Atom D2701), and utilize the DSM 4.2 operating system. Not all Synology DiskStation NAS devices use Intel based CPUs – some of the less expensive DiskStations use ARM type processors (see this link to determine the type of CPU installed in a specific DiskStation). It may be possible to produce a working version of Nagios on NAS devices that do not have Intel 32 bit or 64 bit processors, but I have not yet fully tested the procedure.
Warning: A lot of what follows is based on experimentation, with the end goal of having Nagios running on a Synology DiskStation having the ability to ping devices on the network or the Internet, with an email sent to an administrator when a device stops responding to ping requests, and to send a second email when the device resumes responding to ping requests. This functionality represents a small fraction of Nagios’ capabilities through the use of plugins. File paths vary from one Linux distribution to the next, so that adds a bit of challenge to make certain that the files are placed in the required directory. Copying a file to the wrong directory may temporarily disable the DiskStation and require the reinstallation of the Synology DSM operating system. The directions below are not final, and quite likely do not represent the most efficient approaches to accomplish the end goal – but the directions will hopefully be “close enough to correct” to allow the average reader of this blog to ping and send email alerts from a DiskStation.
I have relied on the free Nagios network monitoring solution since 2002 to provide an early warning of problems associated with network attached equipment including servers, production floor computers, switches, printers, wireless access points, IP cameras, Internet connection stability, etc. While I rely on Nagios’ alerting system, I am not an expert at configuring the Nagios network monitoring system; the Nagios configuration documentation may be downloaded here.
First, make certain that the Telnet Service (or SSH Service if that is preferred) is enabled on the DiskStation. In the DiskStation’s Control Panel, click Terminal.

Place a checkmark next to Enable Telnet service (if the item is not already checked), and then click the Apply button.

Verify that the computer that you intend to use has a Telnet client. For Windows 7, access the Programs link in the Control Panel, and then click the Turn Windows features on or off link. Make certain that there is a checkmark next to Telnet Client, then click the OK button.

Open a command line (in Windows, Start – Run – type cmd and press the Enter key). On the command line, type telnet followed by either the name of the DiskStation or the IP address of the DiskStation, then press the Enter key. When prompted for a username, type root and press the Enter key. Type the admin user’s password (that is used to access the DSM interface in a web browser) and press the Enter key.

The command line on the DiskStation is very similar to the command line on a Unix or Linux computer, and is somewhat similar to a Windows command line or MS-DOS command line (use / rather than \, use ls rather than dir, use vi rather than edit):

—
We first need to add ipkg support to the DiskStation, detailed directions may be viewed at this link. The exact directions may be different for other DiskStation models, but the following directions work for both the DS1813+ and DS412+ (note that all files downloaded from the Internet will be placed on volume1 in the downloads directory – copy and paste the lines to the Telnet session, one line at a time):
cd /volume1
mkdir downloads
cd downloads
wget http://ipkg.nslu2-linux.org/feeds/optware/syno-i686/cross/unstable/syno-i686-bootstrap_1.2-7_i686.xsh
chmod +x syno-i686-bootstrap_1.2-7_i686.xsh
sh syno-i686-bootstrap_1.2-7_i686.xsh
The vi editor is used on the DiskStation to modify files; that vi editor is a bit challenging to use at first sight, so you may need help with a couple of basic commands (see this quick reference for other commands). The commands in vi are case sensitive (i is not the same as I). When a file is opened, press the i key on the keyboard to allow making changes to the file (such as typing commands, or deleting commands). When finished making changes to the file press the Esc key. Once the Esc key is pressed, type ZZ to save the changed file and quit, or :q! to quit without saving the changes.
Next, we must modify the file that establishes the environment for the root user, when that user connects to the DiskStation. This change is needed as part of the ipkg installation. Edit the .profile file used by the root user:
vi /root/.profile
Add a # character in front of the two lines that contain the word PATH, then save the file (see the brief directions above to switch between command and insert mode in vi):

Next, reboot the DiskStation by clicking the Restart button in the Synology DSM interface (note: it should be possible to type reboot in the Telnet interface, however the DiskStation locked up the one time I attempted to execute that command).

Once the DiskStation reboots, reconnect to the DiskStation using Telnet, connecting as the root user, just as was done earlier.
The ipkg command should now work on the command line. First, request that an updated list of available packages is downloaded, then display that list of packages:
ipkg update
ipkg list
Next, download a couple of packages that will be used by the Nagios network monitoring tool. Note that using ipkg to install packages is a lot easier than compiling source code, so have fun with the ipkg utility. When installing the optware-devel package, an error may appear stating that there is an incompatibility between wget and wget-ssl – just ignore that error for now.
ipkg update wget-ssl
ipkg install optware-devel
ipkg install gcc
ipkg install libtool
ipkg install mysql
Next, we need to compile a file and copy a couple of files:
cd /opt/share/libtool/libltdl/
./configure --prefix=/opt
make all
make install

cp /usr/syno/apache/modules/mod_ext_filter.so /opt/libexec/mod_ext_filter.so
cp /usr/syno/apache/modules/*.* /opt/libexec/
Now, install the Apache package:
ipkg install apache
—
If an error message is displayed on screen about mod_ext_filter.so, then modify the /opt/etc/apache2/httpd.conf file and add a # in front of the line LoadModule ext_filter_module libexec/mod_ext_filter.so and save the file. Re-execute the ipkg install apache command (note that the up arrow on the keyboard may be pressed to quickly retype one of the previously executed commands).

—
Using the DiskStation’s Control Panel, create a nagios group and a nagcmd group (the nagcmd group probably will not be used for anything specific). These groups do not require any special DiskStation permissions.

Using the DiskStation’s Control Panel, create a nagios user and add that user to the nagios and nagcmd groups. The nagios user does not require any specific DiskStation permissions.
Next, switch back to the Telnet session, download the Nagios source code, and compile the source code:
DiskStation DS212+ Notes:
The following ./configure call was used on the DS212+:
./configure --prefix=/opt --with-command-group=nagios --disable-nanosleep --enable-nanosleep=no
The ./configure aborted with the following error message:
checking for pthread_create in -lpthread... no
checking for pthread_mutex_init in -lpthread... no
checking for pthread_create in -lpthreads... no
checking for pthread_create in -llthread... no
checking if we need -pthread for threads... no
checking for library containing nanosleep... no
Error: nanosleep() needed for timing operations.
The test that threw the error is located roughly 63% of the way through the configure file (on roughly line 5635). If the exit 1 line in the configure file is commented out, then the configure step will complete. However, the make all command will then fail with the following error messages:
/volume1/downloads/nagios/base/nebmods.c:363: undefined reference to `dlclose'
nebmods.o: In function `neb_load_module':
/volume1/downloads/nagios/base/nebmods.c:218: undefined reference to `dlopen'
/volume1/downloads/nagios/base/nebmods.c:249: undefined reference to `dlsym'
/volume1/downloads/nagios/base/nebmods.c:266: undefined reference to `dlsym'
/volume1/downloads/nagios/base/nebmods.c:299: undefined reference to `dlsym'
/volume1/downloads/nagios/base/nebmods.c:225: undefined reference to `dlerror'
/opt/lib/gcc/arm-none-linux-gnueabi/4.2.3/../../../../arm-none-linux-gnueabi/lib/libpthread.so: undefined reference to `__default_sa_restorer_v2@GLIBC_PRIVATE'
/opt/lib/gcc/arm-none-linux-gnueabi/4.2.3/../../../../arm-none-linux-gnueabi/lib/libpthread.so: undefined reference to `__default_rt_sa_restorer_v2@GLIBC_PRIVAT
E'
/opt/lib/gcc/arm-none-linux-gnueabi/4.2.3/../../../../arm-none-linux-gnueabi/lib/libpthread.so: undefined reference to `__default_rt_sa_restorer_v1@GLIBC_PRIVAT
E'
/opt/lib/gcc/arm-none-linux-gnueabi/4.2.3/../../../../arm-none-linux-gnueabi/lib/libpthread.so: undefined reference to `__default_sa_restorer_v1@GLIBC_PRIVATE'
collect2: ld returned 1 exit status
make[1]: *** [nagios] Error 1
make[1]: Leaving directory `/volume1/downloads/nagios/base'
make: *** [all] Error 2
After a bit of searching on the Internet, I found a page that suggested making the following changes (note that I unsuccessfully tried a couple of other steps that may have also partially corrected the issue):
mkdir /opt/arm-none-linux-gnueabi/lib_disabled
mv /opt/arm-none-linux-gnueabi/lib/libpthread* /opt/arm-none-linux-gnueabi/lib_disabled

cp /lib/libpthread.so.0 /opt/arm-none-linux-gnueabi/lib/
cd /opt/arm-none-linux-gnueabi/lib/
ln -s libpthread.so.0 libpthread.so
ln -s libpthread.so.0 libpthread-2.5.so
After making the above changes, I was able to run the configure and make all commands without receiving an error.
cd /volume1/downloads
wget http://prdownloads.sourceforge.net/sourceforge/nagios/nagios-3.5.0.tar.gz
tar xzf nagios-3.5.0.tar.gz
cd nagios
./configure --prefix=/opt --with-command-group=nagios
make all
make install
make install-init
make install-config
make install-commandmode
We apparently need to copy a couple of files to different locations at this point:
cp /opt/lib/libltdl.so.3 /opt/local/lib/libltdl.so.3
cp /opt/lib/libltdl.so.3 /usr/lib/libltdl.so.3
cp /opt/lib/libltdl.so /usr/lib/
Undo the changes that were earlier made to the /root/.profile file, where # characters were added in front of any line that contained the word PATH. Remove those # characters and save the file:
vi /root/.profile
(This part still needs some fine tuning to make the web interface work with Nagios.) Edit the Nagios Makefile and change the line beginning with HTTPD_CONF to show HTTPD_CONF=/opt/etc/apache2/conf.d Then save the file.
cd /volume1/downloads/nagios
vi Makefile

Execute the following command:
make install-webconf
Create a nagiosadmin user for the web administration, specify a password when prompted:
htpasswd -c /usr/local/etc/htpasswd.users nagiosadmin
Update November 19, 2013:
GabrielM reported in a comment below that it may be necessary to specify the full path to the htpasswd program:
/usr/syno/apache/bin/htpasswd -c /usr/local/etc/htpasswd.users nagiosadmin
Install a couple of additional ipkg packages that will be used by Nagios (the last package adds a ping utility that may be used by Nagios – the security permissions on the DiskStation prevent non-root users from using the built-in ping utility):
ipkg install openssl
ipkg install openssl-dev
ipkg install sendmail
ipkg install inetutils
—
A step that may or may not be required is to download a functioning C++ compiler (some of the commands below point to files provided with the C++ compiler) – it appears that there should already be a compiler on the DiskStation at this point (in /opt/bin), so the successful completion of this task of downloading a usable C++ compiler might not be required.
DiskStation DS212+ Notes:
These wget and tar steps were completely skipped on the DS212+
For the DiskStation DS1813+ 64 bit:
cd /volume1/downloads
wget http://sourceforge.net/projects/dsgpl/files/DSM%204.1%20Tool%20Chains/Intel%20x86%20Linux%203.2.11%20%28Cedarview%29/gcc420_glibc236_x64_cedarview-GPL.tgz
tar zxpf gcc420_glibc236_x64_cedarview-GPL.tgz -C /usr/local/
For the DiskStation DS412+ 32 bit:
cd /volume1/downloads
wget http://sourceforge.net/projects/dsgpl/files/DSM%204.2%20Tool%20Chains/Intel%20x86%20Linux%203.2.11%20%28Bromolow%29/gcc421_glibc236_x86_bromolow-GPL.tgz
tar zxpf gcc421_glibc236_x86_bromolow-GPL.tgz -C /usr/local/
—
Now the net-snmp source code is downloaded and extracted:
DiskStation DS212+ Notes:
The ./configure call on the DS212 (might also work on the other DiskStation models):
./configure –prefix=/opt
The make call threw several errors, including:
/bin/sh: arm-none-linux-gnueabi-ld: not found
make[2]: *** [../blib/arch/auto/NetSNMP/default_store/default_store.so] Error 127
Before running the make command on the DS212+, execute the following command:
ln -s /opt/bin/ld /opt/bin/arm-none-linux-gnueabi-ld
The -i parameter may be omitted when running the make and make install commands.
cd /volume1/downloads
wget http://sourceforge.net/projects/net-snmp/files/net-snmp/5.7.2/net-snmp-5.7.2.tar.gz
tar xzf net-snmp-5.7.2.tar.gz
cd net-snmp-5.7.2
For the DiskStation DS1813+ 64 bit, execute the following to compile the net-snmp source (note that this command uses the compiler that was downloaded):
env CC=/usr/local/x86_64-linux-gnu/bin/x86_64-linux-gnu-gcc \
LD=/usr/local/x86_64-linux-gnu/bin/x86_64-linux-gnu-ld \
RANLIB=/usr/local/x86_64-linux-gnu/bin/x86_64-linux-gnu-ranlib \
CFLAGS="-I/usr/local/x86_64-linux-gnu/include" \
LDFLAGS="-L/usr/local/x86_64-linux-gnu/lib" \
./configure --host=x86_64-linux-gnu --target=x86_64-linux-gnu --build=x86_64-pc-linux --prefix=/usr/local
For the DiskStation DS412+ 32 bit, execute the following to compile the net-snmp source (note: I could not use any of the different compilers that I tried downloading due to the compilers crashing with one of two error messages, so this command uses the compiler in /opt/bin):
env CC=/opt/bin/i686-linux-gnu-gcc \
LD=/usr/local/i686-linux-gnu/bin/i686-linux-gnu-ld \
RANLIB=/usr/local/i686-linux-gnu/bin/i686-linux-gnu-ranlib \
CFLAGS="-I/usr/local/i686-linux-gnu/include" \
LDFLAGS="-L/usr/local/i686-linux-gnu/lib" \
./configure --host=i686-linux-gnu --target=i686-linux-gnu --build=i686-linux-gnu --prefix=/usr/local
Several prompts will appear on the screen when either of the two commands is executed. I entered the following for the prompts:
Default version of SNMP to use (3): 3
System Contact Information: (Enter)
System Location (Unknown): (Enter)
Location to write logfile (/var/log/snmpd.log): /opt/var/snmpd.log
Location to write persistent information (/var/net-snmp): (Enter)
Two additional commands to execute:
make -i
make install -i
Now we need to download the source code for the Nagios plugins (check_apt, check_breeze, check_by_ssh, check_clamd, check_cluster, check_dhcp, check_disk, check_disk_smb, check_dns, check_dummy, check_file_age, check_flexlm, check_ftp, check_http, check_icmp, check_ide_smart, check_ifoperstatup, check_ifstatus, check_imap, check_ircd, check_jabber, check_ldap, check_ldaps, check_load, check_log, check_mailq, check_mrtg, check_mrtgtraf, check_mysql, check_mysql_query, check_nagios, check_nntp, check_nntps, check_nt, check_ntp, check_ntp_peer, check_ntp_time, check_nwstat, check_oracle, check_overcr, check_ping, check_pop, check_procs, check_real, check_rpc, check_sensors, check_simap, check_smtp, check_snmp, check_spop, check_ssh, check_ssmtp, check_swap, check_tcp, check_time, check_udp, check_ups, check_users, check_wave) that allow Nagios to perform various monitoring tasks:
cd /volume1/downloads
wget http://prdownloads.sourceforge.net/sourceforge/nagiosplug/nagios-plugins-1.4.16.tar.gz
tar xzf nagios-plugins-1.4.16.tar.gz
cd nagios-plugins-1.4.16/
Update November 19, 2013:
GabrielM reported in a comment below that the occasionally changing “current version” of the Nagios plugins makes it difficult to download the plugins from the source shown above. If you open the http://prdownloads.sourceforge.net/sourceforge/nagiosplug/ web page in a web browser, the web browser will be redirected to http://sourceforge.net/projects/nagiosplug/files/ which contains the following statement:
“The Nagios Plugins are no longer distributed via SourceForge. For downloads and other information, please visit: https://www.nagios-plugins.org/
Source: README.md, updated 2013-10-01″
If you follow that link and then click the Download heading at the top of the page, there should be a link on the page that allows access to the current version of the Nagios plugins. That link is currently: https://www.nagios-plugins.org/download/nagios-plugins-1.5.tar.gz
The command that GabrielM provided should work:
wget https://www.nagios-plugins.org/download/nagios-plugins-1.5.tar.gz
—
DiskStation DS212+ Notes:
The following configure, make, and make install commands were used:
./configure --prefix=/opt --with-openssl=/usr/syno/bin/openssl --with-nagios-user=nagios --with-nagios-group=nagios --with-ping-command="/opt/bin/ping -c %d %s" --psdir=/bin --with-ps-varlist="&procpid,&procppid,&procvsz,&procrss,procprog,&pos" --with-ps-cols=6 --with-ps-format="%d %d %d %d %s %n" --with-ps-command="/bin/ps -w"
make
make install
For the DiskStation DS1813+ 64 bit:
./configure --with-openssl=/usr/syno/bin/openssl --with-nagios-user=nagios --with-nagios-group=nagios --with-ping-command="/opt/bin/ping -c %d %s" --psdir=/bin --with-ps-varlist="&procpid,&procppid,&procvsz,&procrss,procprog,&pos" --with-ps-cols=6 --with-ps-format="%d %d %d %d %s %n" --with-ps-command="/bin/ps -w" --host=x86_64-linux-gnu --target=x86_64-linux-gnu --build=x86_64-pc-linux
make -i
make install -i
For the DiskStation DS412+ 32 bit:
./configure --with-openssl=/usr/syno/bin/openssl --with-nagios-user=nagios --with-nagios-group=nagios --with-ping-command="/opt/bin/ping -c %d %s" --psdir=/bin --with-ps-varlist="&procpid,&procppid,&procvsz,&procrss,procprog,&pos" --with-ps-cols=6 --with-ps-format="%d %d %d %d %s %n" --with-ps-command="/bin/ps -w" --host=i686-linux-gnu --target=i686-linux-gnu --build=i686-linux-gnu --prefix=/usr/local
make -i
make install -i
Copy the Nagios plugins to the location expected by Nagios:
DiskStation DS212+ Notes:
The plugins were installed in the correct location on the DS212+
cp /usr/local/nagios/libexec/*.* /opt/libexec
cp /usr/local/nagios/libexec/* /opt/libexec
cp /usr/local/libexec/check_* /opt/libexec
Update November 19, 2013:
GabrielM reported in a comment below that the third command above may fail. Depending on the compile options used, the first two commands or the third command may fail. The first two commands are intended to accomplish the same task as the third command; the first two commands or the last command are expected to fail, but all three commands should not fail. I should have explained this potential area of concern better.
Copy the Nagios startup script to the correct location so that Nagios will automatically start when the DiskStation is rebooted:
cp /usr/local/etc/rc.d/nagios /opt/etc/init.d/S81nagios
Verify that the ownership of the nagios directory is set correctly:
DiskStation DS212+ Notes:
The file is actually in the /opt/bin directory, so use this command instead:
chown nagios:nagios /opt/bin/nagios/nagios -R
chown nagios:nagios /usr/local/nagios -R
In addition to the main /opt/etc/nagios.cfg Nagios file, there are several other configuration files that are potentially used by Nagios (defined in the nagios.cfg file):
/opt/etc/objects/commands.cfg
/opt/etc/objects/contacts.cfg
/opt/etc/objects/timeperiods.cfg
/opt/etc/objects/templates.cfg
/opt/etc/objects/localhost.cfg
/opt/etc/objects/windows.cfg
/opt/etc/objects/server.cfg
/opt/etc/objects/switch.cfg
/opt/etc/objects/printer.cfg
We need to make a couple of adjustments in the /opt/etc/objects/commands.cfg file.
vi /opt/etc/objects/commands.cfg
Change the ‘notify-host-by-email’ command definition section as follows:
define command{
    command_name notify-host-by-email
    command_line /usr/bin/printf "%b" "Subject: $NOTIFICATIONTYPE$ Host Alert: $HOSTNAME$ is $HOSTSTATE$\n\n***** Nagios *****\n\nNotification Type: $NOTIFICATIONTYPE$\nHost: $HOSTNAME$\nState: $HOSTSTATE$\nAddress: $HOSTADDRESS$\nInfo: $HOSTOUTPUT$\n\nDate/Time: $LONGDATETIME$\n" | /opt/sbin/sendmail -vt $CONTACTEMAIL$
    }
Change the ‘notify-service-by-email’ command definition section as follows:
define command{
    command_name notify-service-by-email
    command_line /usr/bin/printf "%b" "Subject: $NOTIFICATIONTYPE$ Service Alert: $HOSTALIAS$/$SERVICEDESC$ is $SERVICESTATE$\n\n***** Nagios *****\n\nNotification Type: $NOTIFICATIONTYPE$\n\nService: $SERVICEDESC$\nHost: $HOSTALIAS$\nAddress: $HOSTADDRESS$\nState: $SERVICESTATE$\n\nDate/Time: $LONGDATETIME$\n\nAdditional Info:\n\n$SERVICEOUTPUT$\n" | /opt/sbin/sendmail -vt $CONTACTEMAIL$
    }
Change the ‘check_ping’ command definition section as follows (feel free to read the documentation for check_ping and specify different values):
define command{
        command_name    check_ping
        command_line    $USER1$/check_ping -H $HOSTADDRESS$ -w 3000,25% -c 5000,90% -p 3
        }
Save the file and exit vi.
At this point, the Nagios network monitoring utility will likely experience an error similar to the following when attempting to send an alert email:
output=collect: Cannot write ./dfr6BFFPC7027203 (bfcommit, uid=1026, gid=25): Permission denied
Execute the following commands, which should fix the above problem:
chmod g+w /opt/var/spool/clientmqueue
chmod 444 /opt/etc/mail/*.cf
chmod 7555 /opt/sbin/sendmail
We will need to use su to test the execution of various commands as the nagios user. Without this fix (described here), you might see the following error message:
su: warning: cannot change directory to /var/services/homes/nagios: No such file or directory su: /sbin/nologin: No such file or directory
Enter the following commands:
mkdir /var/services/homes
mkdir /var/services/homes/nagios
chown nagios:nagios /var/services/homes/nagios -R
vi /etc/passwd
Locate the line in the passwd file for the Nagios user. Near the end of the line, /sbin/nologin should appear. Replace that text with /bin/ash then save and exit vi.
Verify that the Nagios user is able to execute the check_ping plugin. Replace MyDeviceHere with either an IP address or a network device name that is on your network:
su - nagios -c "/opt/libexec/check_ping -H MyDeviceHere -w 5000,80% -c 5000,80% -p 5"
—
If the ping command (called by check_ping) is not able to resolve a network device name, and the fully qualified dns name was not specified (MyDeviceHere.MyDomainHere.com), edit the /etc/resolv.conf file:
vi /etc/resolv.conf
On a new line in the file, add the following line (replacing MyDomainHere.com with your dns domain name for the network):
search MyDomainHere.com
—
Verify that sendmail works for the Nagios user. At the prompt that appears, type a short message, press the Enter key, type a period, then press the Enter key again – replace MyEmailAddressHere@MyDomainHere.com with your email address):
su - nagios -c "/opt/sbin/sendmail -vt MyEmailAddressHere@MyDomainHere.com"
—-
It is important to always verify the Nagios configuration before starting (or restarting after a configuration change) Nagios. To verify the configuration type the following:
/opt/bin/nagios -v /opt/etc/nagios.cfg
To start up Nagios as a background task (daemon), execute the following:
/opt/bin/nagios -d /opt/etc/nagios.cfg
To stop Nagios that is executing as a background task, type:
ps

Then search though the list of processes for the first line that shows /opt/bin/nagios -d /opt/etc/nagios.cfg. The number at the left of that line, 31152 in this case, is used to stop Nagios. To stop Nagios, type the following (replace 31152 with the number shown on your screen):
kill 31152
—
Side note: I tried installing quite a few different C++ compilers that supposedly work with the Synology DSM (see here). As such, I had to find a way to remove a directory, that directory’s subdirectories, and files. The following command will completely remove the /usr/local/i686-linux-gnu directory, should the need arise:
rm -rf /usr/local/i686-linux-gnu
—
At this point, Nagios will hopefully run as a background task, and it should be able to ping and send email alerts. However, if you were following the above directions, we have not yet instructed Nagios which devices to monitor, and to whom the alert emails should be sent. The next step is to define the email contacts by modifying the /opt/etc/objects/contacts.cfg file (see the documentation for assistance):
vi /opt/etc/objects/contacts.cfg
After setting up the contacts, we should probably tell Nagios which devices to monitor. If there are a lot of devices on your network to be monitored, you might find that using Microsoft Excel rather than vi to create the object definitions makes the task more manageable. Set up a simple worksheet with four columns. Column A will be used to specify the short host_name for the object to be monitored. Column B will be used to specify the alias (long description for the object). Column C will be used to either specify the IP address for the device or the network name for the device. Column D will be used to identify the group to which the object belongs and the file name to which the definition is saved (the Excel macro supports the following groups: ap, camera, computer, external, other, printer, server, switch).

The Excel macro is set up to read a tab delimited file, rather than reading the object description directly from the Excel worksheet. Highlight all of the rows in the worksheet except for the top header row, and press Ctrl C (or edit – Copy) to copy the definitions to the Windows clipboard in tab delimited format. Start Notepad (Start – Run – Notepad), and then press Ctrl V (or edit – Paste) to paste the tab delimited object descriptions into Notepad. The Excel macro code expects the text file to be saved as nagioshosts.txt.
The Excel macro code follows (I image that not many computers still have a second floppy drive installed, so change the B:\Hardware Documentation\Synology\ path as appropriate for your environment):
Private Sub cmdProcessText_Click()
    Dim intFileNumRead As Integer
    Dim intFileNumAP As Integer
    Dim intFileNumCamera As Integer
    Dim intFileNumComputer As Integer
    Dim intFileNumExternal As Integer
    Dim intFileNumOther As Integer
    Dim intFileNumPrinter As Integer
    Dim intFileNumServer As Integer
    Dim intFileNumSwitch As Integer
    Dim intFileNumWrite As Integer

    Dim strLine As String
    Dim strItem() As String

    intFileNumRead = FreeFile
    Open "B:\Hardware Documentation\Synology\nagioshosts.txt" For Input As #intFileNumRead

    intFileNumAP = FreeFile
    Open "B:\Hardware Documentation\Synology\ap.cfg" For Output As intFileNumAP
    Print #intFileNumAP, "###############################################################################"; Chr(10);
    Print #intFileNumAP, "# ap.cfg - lists the wireless access points to be monitored"; Chr(10);
    Print #intFileNumAP, "#"; Chr(10);
    Print #intFileNumAP, "# Last Modified: "; Now; Chr(10);
    Print #intFileNumAP, "###############################################################################"; Chr(10);
    Print #intFileNumAP, "#"; Chr(10); Chr(10);
    Print #intFileNumAP, "###############################################################################"; Chr(10);
    Print #intFileNumAP, "#"; Chr(10);
    Print #intFileNumAP, "# HOST GROUP DEFINITIONS"; Chr(10);
    Print #intFileNumAP, "#"; Chr(10);
    Print #intFileNumAP, "###############################################################################"; Chr(10);
    Print #intFileNumAP, "#"; Chr(10); Chr(10);
    Print #intFileNumAP, "define hostgroup{"; Chr(10);
    Print #intFileNumAP, "        hostgroup_name  ap                      ; The name of the hostgroup"; Chr(10);
    Print #intFileNumAP, "        alias           Local Access Points       ; Long name of the group"; Chr(10);
    Print #intFileNumAP, "        }"; Chr(10); Chr(10); Chr(10);

    intFileNumCamera = FreeFile
    Open "B:\Hardware Documentation\Synology\camera.cfg" For Output As intFileNumCamera
    Print #intFileNumCamera, "###############################################################################"; Chr(10);
    Print #intFileNumCamera, "# camera.cfg - lists the IP cameras to be monitored"; Chr(10);
    Print #intFileNumCamera, "#"; Chr(10);
    Print #intFileNumCamera, "# Last Modified: "; Now; Chr(10);
    Print #intFileNumCamera, "###############################################################################"; Chr(10);
    Print #intFileNumCamera, "#"; Chr(10); Chr(10);
    Print #intFileNumCamera, "###############################################################################"; Chr(10);
    Print #intFileNumCamera, "#"; Chr(10);
    Print #intFileNumCamera, "# HOST GROUP DEFINITIONS"; Chr(10);
    Print #intFileNumCamera, "#"; Chr(10);
    Print #intFileNumCamera, "###############################################################################"; Chr(10);
    Print #intFileNumCamera, "#"; Chr(10); Chr(10);
    Print #intFileNumCamera, "define hostgroup{"; Chr(10);
    Print #intFileNumCamera, "        hostgroup_name  camera                  ; The name of the hostgroup"; Chr(10);
    Print #intFileNumCamera, "        alias           Local IP Cameras          ; Long name of the group"; Chr(10);
    Print #intFileNumCamera, "        }"; Chr(10); Chr(10); Chr(10);

    intFileNumComputer = FreeFile
    Open "B:\Hardware Documentation\Synology\computer.cfg" For Output As intFileNumComputer
    Print #intFileNumComputer, "###############################################################################"; Chr(10);
    Print #intFileNumComputer, "# computer.cfg - lists the shop floor computers to be monitored"; Chr(10);
    Print #intFileNumComputer, "#"; Chr(10);
    Print #intFileNumComputer, "# Last Modified: "; Now; Chr(10);
    Print #intFileNumComputer, "###############################################################################"; Chr(10);
    Print #intFileNumComputer, "#"; Chr(10); Chr(10);
    Print #intFileNumComputer, "###############################################################################"; Chr(10);
    Print #intFileNumComputer, "#"; Chr(10);
    Print #intFileNumComputer, "# HOST GROUP DEFINITIONS"; Chr(10);
    Print #intFileNumComputer, "#"; Chr(10);
    Print #intFileNumComputer, "###############################################################################"; Chr(10);
    Print #intFileNumComputer, "#"; Chr(10); Chr(10);
    Print #intFileNumComputer, "define hostgroup{"; Chr(10);
    Print #intFileNumComputer, "        hostgroup_name  computer               ; The name of the hostgroup"; Chr(10);
    Print #intFileNumComputer, "        alias           Domain Computers          ; Long name of the group"; Chr(10);
    Print #intFileNumComputer, "        }"; Chr(10); Chr(10); Chr(10);

    intFileNumExternal = FreeFile
    Open "B:\Hardware Documentation\Synology\external.cfg" For Output As intFileNumExternal
    Print #intFileNumExternal, "###############################################################################"; Chr(10);
    Print #intFileNumExternal, "# external.cfg - lists the devices external to the LAN network to be monitored"; Chr(10);
    Print #intFileNumExternal, "#"; Chr(10);
    Print #intFileNumExternal, "# Last Modified: "; Now; Chr(10);
    Print #intFileNumExternal, "###############################################################################"; Chr(10);
    Print #intFileNumExternal, "#"; Chr(10); Chr(10);
    Print #intFileNumExternal, "###############################################################################"; Chr(10);
    Print #intFileNumExternal, "#"; Chr(10);
    Print #intFileNumExternal, "# HOST GROUP DEFINITIONS"; Chr(10);
    Print #intFileNumExternal, "#"; Chr(10);
    Print #intFileNumExternal, "###############################################################################"; Chr(10);
    Print #intFileNumExternal, "#"; Chr(10); Chr(10);
    Print #intFileNumExternal, "define hostgroup{"; Chr(10);
    Print #intFileNumExternal, "        hostgroup_name  external               ; The name of the hostgroup"; Chr(10);
    Print #intFileNumExternal, "        alias           Monitored devices External to the Network ; Long name of the group"; Chr(10);
    Print #intFileNumExternal, "        }"; Chr(10); Chr(10); Chr(10);

    intFileNumOther = FreeFile
    Open "B:\Hardware Documentation\Synology\other.cfg" For Output As intFileNumOther
    Print #intFileNumOther, "###############################################################################"; Chr(10);
    Print #intFileNumOther, "# other.cfg - lists the miscellaneous devices to be monitored"; Chr(10);
    Print #intFileNumOther, "#"; Chr(10);
    Print #intFileNumOther, "# Last Modified: "; Now; Chr(10);
    Print #intFileNumOther, "###############################################################################"; Chr(10);
    Print #intFileNumOther, "#"; Chr(10); Chr(10);
    Print #intFileNumOther, "###############################################################################"; Chr(10);
    Print #intFileNumOther, "#"; Chr(10);
    Print #intFileNumOther, "# HOST GROUP DEFINITIONS"; Chr(10);
    Print #intFileNumOther, "#"; Chr(10);
    Print #intFileNumOther, "###############################################################################"; Chr(10);
    Print #intFileNumOther, "#"; Chr(10); Chr(10);
    Print #intFileNumOther, "define hostgroup{"; Chr(10);
    Print #intFileNumOther, "        hostgroup_name  other                 ; The name of the hostgroup"; Chr(10);
    Print #intFileNumOther, "        alias           Miscellaneous Devices ; Long name of the group"; Chr(10);
    Print #intFileNumOther, "        }"; Chr(10); Chr(10); Chr(10);

    intFileNumPrinter = FreeFile
    Open "B:\Hardware Documentation\Synology\printer.cfg" For Output As intFileNumPrinter
    Print #intFileNumPrinter, "###############################################################################"; Chr(10);
    Print #intFileNumPrinter, "# printer.cfg - lists the printer devices to be monitored"; Chr(10);
    Print #intFileNumPrinter, "#"; Chr(10);
    Print #intFileNumPrinter, "# Last Modified: "; Now; Chr(10);
    Print #intFileNumPrinter, "###############################################################################"; Chr(10);
    Print #intFileNumPrinter, "#"; Chr(10); Chr(10);
    Print #intFileNumPrinter, "###############################################################################"; Chr(10);
    Print #intFileNumPrinter, "#"; Chr(10);
    Print #intFileNumPrinter, "# HOST GROUP DEFINITIONS"; Chr(10);
    Print #intFileNumPrinter, "#"; Chr(10);
    Print #intFileNumPrinter, "###############################################################################"; Chr(10);
    Print #intFileNumPrinter, "#"; Chr(10); Chr(10);
    Print #intFileNumPrinter, "define hostgroup{"; Chr(10);
    Print #intFileNumPrinter, "        hostgroup_name  printer               ; The name of the hostgroup"; Chr(10);
    Print #intFileNumPrinter, "        alias           Printers and Copiers  ; Long name of the group"; Chr(10);
    Print #intFileNumPrinter, "        }"; Chr(10); Chr(10); Chr(10);

    intFileNumServer = FreeFile
    Open "B:\Hardware Documentation\Synology\server.cfg" For Output As intFileNumServer
    Print #intFileNumServer, "###############################################################################"; Chr(10);
    Print #intFileNumServer, "# server.cfg - lists the servers to be monitored"; Chr(10);
    Print #intFileNumServer, "#"; Chr(10);
    Print #intFileNumServer, "# Last Modified: "; Now; Chr(10);
    Print #intFileNumServer, "###############################################################################"; Chr(10);
    Print #intFileNumServer, "#"; Chr(10); Chr(10);
    Print #intFileNumServer, "###############################################################################"; Chr(10);
    Print #intFileNumServer, "#"; Chr(10);
    Print #intFileNumServer, "# HOST GROUP DEFINITIONS"; Chr(10);
    Print #intFileNumServer, "#"; Chr(10);
    Print #intFileNumServer, "###############################################################################"; Chr(10);
    Print #intFileNumServer, "#"; Chr(10); Chr(10);
    Print #intFileNumServer, "define hostgroup{"; Chr(10);
    Print #intFileNumServer, "        hostgroup_name  server               ; The name of the hostgroup"; Chr(10);
    Print #intFileNumServer, "        alias           Server and Similar Devices ; Long name of the group"; Chr(10);
    Print #intFileNumServer, "        }"; Chr(10); Chr(10); Chr(10);

    intFileNumSwitch = FreeFile
    Open "B:\Hardware Documentation\Synology\switch.cfg" For Output As intFileNumSwitch
    Print #intFileNumSwitch, "###############################################################################"; Chr(10);
    Print #intFileNumSwitch, "# switch.cfg - lists the network equipment type devices to be monitored"; Chr(10);
    Print #intFileNumSwitch, "#"; Chr(10);
    Print #intFileNumSwitch, "# Last Modified: "; Now; Chr(10);
    Print #intFileNumSwitch, "###############################################################################"; Chr(10);
    Print #intFileNumSwitch, "#"; Chr(10); Chr(10);
    Print #intFileNumSwitch, "###############################################################################"; Chr(10);
    Print #intFileNumSwitch, "#"; Chr(10);
    Print #intFileNumSwitch, "# HOST GROUP DEFINITIONS"; Chr(10);
    Print #intFileNumSwitch, "#"; Chr(10);
    Print #intFileNumSwitch, "###############################################################################"; Chr(10);
    Print #intFileNumSwitch, "#"; Chr(10); Chr(10);
    Print #intFileNumSwitch, "define hostgroup{"; Chr(10);
    Print #intFileNumSwitch, "        hostgroup_name  switch               ; The name of the hostgroup"; Chr(10);
    Print #intFileNumSwitch, "        alias           Switche and Similar Devices ; Long name of the group"; Chr(10);
    Print #intFileNumSwitch, "        }"; Chr(10); Chr(10); Chr(10);

    Do While Not (EOF(intFileNumRead))
        Line Input #intFileNumRead, strLine
        strItem = Split(strLine, vbTab)
        'strItem(0) = host_name
        'strItem(1) = alias
        'strItem(2) = address
        'strItem(3) = hostgroups
        Select Case strItem(3)
            Case "ap"
                intFileNumWrite = intFileNumAP
            Case "camera"
                intFileNumWrite = intFileNumCamera
            Case "computer"
                intFileNumWrite = intFileNumComputer
            Case "external"
                intFileNumWrite = intFileNumExternal
            Case "other"
                intFileNumWrite = intFileNumOther
            Case "printer"
                intFileNumWrite = intFileNumPrinter
            Case "server"
                intFileNumWrite = intFileNumServer
            Case "switch"
                intFileNumWrite = intFileNumSwitch
        End Select

        Print #intFileNumWrite, "define host{"; Chr(10);
        Select Case strItem(3)
            Case "ap"
                Print #intFileNumWrite, "        use             ap              ; Inherit default values from a template"; Chr(10);
            Case "camera"
                Print #intFileNumWrite, "        use             camera          ; Inherit default values from a template"; Chr(10);
            Case "computer"
                Print #intFileNumWrite, "        use             computer        ; Inherit default values from a template"; Chr(10);
            Case "external"
                Print #intFileNumWrite, "        use             external        ; Inherit default values from a template"; Chr(10);
            Case "other"
                Print #intFileNumWrite, "        use             other           ; Inherit default values from a template"; Chr(10);
            Case "printer"
                Print #intFileNumWrite, "        use             printer         ; Inherit default values from a template"; Chr(10);
            Case "server"
                Print #intFileNumWrite, "        use             server          ; Inherit default values from a template"; Chr(10);
            Case "switch"
                Print #intFileNumWrite, "        use             switch          ; Inherit default values from a template"; Chr(10);
        End Select
        Print #intFileNumWrite, "        host_name       "; strItem(0); "         ; The name we're giving to this device"; Chr(10);
        Print #intFileNumWrite, "        alias           "; strItem(1); "         ; A longer name associated with the device"; Chr(10);
        Print #intFileNumWrite, "        address         "; strItem(2); "         ; IP address of the device"; Chr(10);
        Print #intFileNumWrite, "        hostgroups      "; strItem(3); "         ; Host groups this device is associated with"; Chr(10);
        Print #intFileNumWrite, "        }"; Chr(10); Chr(10);

        Print #intFileNumWrite, "define service{"; Chr(10);
        Print #intFileNumWrite, "        use                     generic-service ; Inherit values from a template"; Chr(10);
        Print #intFileNumWrite, "        host_name               "; strItem(0); "        ; The name of the host the service is associated with"; Chr(10);
        Print #intFileNumWrite, "        service_description     PING            ; The service description"; Chr(10);
        Print #intFileNumWrite, "        check_command           check_ping!3000,25%!5000,90%    ; The command used to monitor the service"; Chr(10);
        Print #intFileNumWrite, "        normal_check_interval   5               ; Check the service every 5 minutes under normal conditions"; Chr(10);
        Print #intFileNumWrite, "        retry_check_interval    1               ; Re-check the service every minute until its final/hard state is determined"; Chr(10);
        Print #intFileNumWrite, "        }"; Chr(10); Chr(10);
    Loop

    Close #intFileNumRead
    Close #intFileNumAP
    Close #intFileNumCamera
    Close #intFileNumComputer
    Close #intFileNumExternal
    Close #intFileNumOther
    Close #intFileNumPrinter
    Close #intFileNumServer
    Close #intFileNumSwitch
End Sub
The files that are created use Unix/Linux standard line feed end of line marker characters, rather than the Windows standard carriage return/line feed combination characters. As such, opening the generated files using Notepad is not advised. Copy the generated files back to the /opt/etc/objects/ path on the DiskStation (copy the files to a Shared Folder on the DiskStation, then use the cp command to copy the files from the share location to /opt/etc/objects/ – the Shared Folders are typically created as a subdirectory in the /volume1/ directory).
If you decided to use some of the non-standard Nagios group names (as I did), those non-standard group names must be defined in the /opt/etc/objects/templates.cfg file:
vi /opt/etc/objects/templates.cfg
A portion of the additional entries that I made in this file include the following:
define host{
       name                    ap      ; The name of this host template
       use                     generic-host    ; Inherit default values from the generic-host temp
       check_period            24x7            ; By default, access points are monitored round t
       check_interval          5               ; Actively check the access point every 5 minutes
       retry_interval          1               ; Schedule host check retries at 1 minute intervals
       max_check_attempts      10              ; Check each access point 10 times (max)
       check_command           check_ping      ; Default command to check if access points are "alive"
       notification_period     24x7            ; Send notification out at any time - day or night
       notification_interval   30              ; Resend notifications every 30 minutes
       notification_options    d,r             ; Only send notifications for specific host states
       contact_groups          admins          ; Notifications get sent to the admins by default
       hostgroups              ap ; Host groups that access points should be a member of
       register                0               ; DONT REGISTER THIS - ITS JUST A TEMPLATE
       }

define host{
       name                    camera  ; The name of this host template
       use                     generic-host    ; Inherit default values from the generic-host temp
       check_period            24x7            ; By default, cameras are monitored round t
       check_interval          60              ; Actively check the device every 60 minutes
       retry_interval          1               ; Schedule host check retries at 1 minute intervals
       max_check_attempts      10              ; Check each device 10 times (max)
       check_command           check_ping      ; Default command to check if device are "alive"
       notification_period     24x7            ; Send notification out at any time - day or night
       notification_interval   240             ; Resend notifications every 240 minutes
       notification_options    d,r             ; Only send notifications for specific host states
       contact_groups          admins          ; Notifications get sent to the admins by default
       hostgroups              camera ; Host groups that cameras should be a member of
       register                0               ; DONT REGISTER THIS - ITS JUST A TEMPLATE
       }
Nagios will not know that it should read the additional configuration files until it is told to do so by modifying the /opt/etc/nagios.cfg file.
vi /opt/etc/nagios.cfg
Add the following lines to the nagios.cfg file:
# Charles Hooper's object types
cfg_file=/opt/etc/objects/ap.cfg
cfg_file=/opt/etc/objects/camera.cfg
cfg_file=/opt/etc/objects/computer.cfg
cfg_file=/opt/etc/objects/external.cfg
cfg_file=/opt/etc/objects/other.cfg
cfg_file=/opt/etc/objects/printer.cfg
cfg_file=/opt/etc/objects/server.cfg
cfg_file=/opt/etc/objects/switch.cfg
—
We have made a large number of changes to the configuration files, so it is important to verify that there are no errors in the configuration:
/opt/bin/nagios -v /opt/etc/nagios.cfg
If no errors are found in the configuration, terminate (kill) nagios and then restart as described above.
—-
Update July 28, 2013:
When attempting to start Nagios in daemon mode (/opt/bin/nagios -d /opt/etc/nagios.cfg) I encountered a couple of problems related to permissions for the Nagios user. The nagios process was not listed when I used the ps command. I then tried executing the following commands:
touch /opt/var/nagios.log
chown nagios:nagios /opt/var/nagios.log
Nagios was then able to start in daemon mode, but wrote messages similar to the following in the /opt/var/nagios.log file:
[1375058364] Warning: Could not open object cache file ‘/opt/var/objects.cache’ for writing!
[1375058364] Failed to obtain lock on file /opt/var/nagios.lock: Permission denied
[1375058364] Bailing out due to errors encountered while attempting to daemonize… (PID=11451)
[1375058656] Nagios 3.5.0 starting… (PID=12936)
[1375058656] Local time is Sun Jul 28 20:44:16 EDT 2013
[1375058656] LOG VERSION: 2.0
[1375058656] Warning: Could not open object cache file ‘/opt/var/objects.cache’ for writing!
[1375058656] Failed to obtain lock on file /opt/var/nagios.lock: Permission denied
[1375058656] Bailing out due to errors encountered while attempting to daemonize… (PID=12936)
[1375060107] Error: Unable to create temp file for writing status data: Permission denied
[1375060117] Error: Unable to create temp file for writing status data: Permission denied
[1375060127] Error: Unable to create temp file for writing status data: Permission denied
[1375060137] Error: Unable to create temp file for writing status data: Permission denied
[1375060147] Error: Unable to create temp file for writing status data: Permission denied
[1375060157] Error: Unable to create temp file for writing status data: Permission denied
I tried to set the permissions for a couple of other files, only to find another long list of Permission denied messages:
touch /opt/var/objects.cache
touch /opt/var/nagios.lock
touch /opt/var/nagios.tmp
chown nagios:nagios /opt/var/objects.cache
chown nagios:nagios /opt/var/nagios.lock
chown nagios:nagios /opt/var/nagios.tmp
I then recalled that I had seen similar messages on the DiskStation DS412+. I then tried a different approach, creating a nagios directory in the /opt/var directory, creating a couple of subdirectories in that directory, and then assigning nagios as the owner of that directory structure:
mkdir /opt/var/nagios
mkdir /opt/var/nagios/archives
mkdir /opt/var/nagios/spool
mkdir /opt/var/nagios/spool/checkresults
chown nagios:nagios /opt/var/nagios -R
vi /opt/etc/nagios.cfg
In the nagios.cfg file, I made the following changes:
log_file=/opt/var/nagios/nagios.log
status_file=/opt/var/nagios/status.dat
lock_file=/opt/var/nagios/nagios.lock
temp_file=/opt/var/nagios/nagios.tmp
log_archive_path=/opt/var/nagios/archives
check_result_path=/opt/var/nagios/spool/checkresults
state_retention_file=/opt/var/nagios/retention.dat
debug_file=/opt/var/nagios/nagios.debug
After saving the file and exiting vi, I restarted Nagios in daemon mode. Reading the last 100 lines of the Nagios log file is now accomplished with this command:
tail -n 100 /opt/var/nagios/nagios.log
—-
There are a lot of seemingly interesting Nagios plugins, including check_oracle (I believe that this plugin requires the Oracle client to be installed – good luck with that install). On one of the DiskStations the check_snmp plugin did not compile, while on the other DiskStation the check_http plugin did not compile.
It might be interesting to see what solutions readers are able to develop from the above starting point. The above information is the result of many hours of experimentation as well as a couple minutes reading through sections of the Nagios documentation (it reads like the Oracle Database documentation, so it should be an easy read once I am in the right mood) and hopelessly scanning the ‘net for information about obscure error messages. Have fun, and try not to put the DiskStation out of service due to a mistaken file copy.
Update November 19, 2013:
Installing an updated version of the Synology DSM operating system may temporarily disable Nagios. Make backups of all Nagios confirguration files (copying the files with the cp command to a directory in /volume1 is generally safe) before installing different versions of the Synology DSM operating system.
The DSM 4.3 operating system installation apparently removed the /var/services/homes directory. That directory removal makes it impossible for the Nagios user to login to run various commands. I assume that the removal of the homes directory is intentional, so a work around for that problem:
mkdir /var/services/home
mkdir /var/services/home/nagios
chown nagios:nagios /var/services/home/nagios -R
vi /etc/passwd
In the /etc/passwd file, change all /homes/ entries to /home/ then save and exit vi.
—
The installation of the different DSM version (including versions before 4.3) will likely also replace/remove the libltdl.* files located in /opt/local/lib and /usr/lib, so we need to copy those files back into the correct directories:
cp /opt/lib/libltdl.so.3 /opt/local/lib/libltdl.so.3
cp /opt/lib/libltdl.so.3 /usr/lib/libltdl.so.3
cp /opt/lib/libltdl.so /usr/lib/
Once the above items are copied, try executing the check_ping command as the nagios user (replace MyDeviceHere with either an IP address or the name of a device on your network).
su - nagios -c "/opt/libexec/check_ping -H MyDeviceHere -w 5000,80% -c 5000,80% -p 5"
If the DiskStation reports that the check_ping command was not found, then copy that file back to the /opt/libexec/ directory. If the above command was successful, try verifying the Nagios configuration:
/opt/bin/nagios -v /opt/etc/nagios.cfg
If the verification was successful, start Nagios as a daemon:
/opt/bin/nagios -d /opt/etc/nagios.cfg
Execute the ps command and verify that the above command is listed in the running processes:
ps
Finally, verify that Nagios is still set to start automatically as a daemon:
ls /opt/etc/init.d/S81nagios
If a file is listed when the above command is executed, then Nagios should now be fully repaired.
–
Update August 11, 2015:
You may at some point need to verify that a http web server is online. If you execute the following command (replace http://www.mydomain.com with an actual web server for a domain to be monitored):
/opt/libexec/check_http -H www.mydomain.com
You may see one of the following errors:
/opt/libexec/check_http: error while loading shared libraries: libssl.so.0.9.8: cannot open shared object file: No such file or directory
/opt/libexec/check_http: error while loading shared libraries: libcrypto.so.0.9.8: cannot open shared object file: No such file or directory
The problem is likely caused by two missing symbolic links. The following commands worked on the DS415+ (and also both the DS1813+ and the DS412+):
ln -s /usr/lib/libssl.so.1.0.0 /usr/lib/libssl.so.0.9.8
ln -s /lib/libcrypto.so.1.0.0 /usr/lib/libcrypto.so.0.9.8


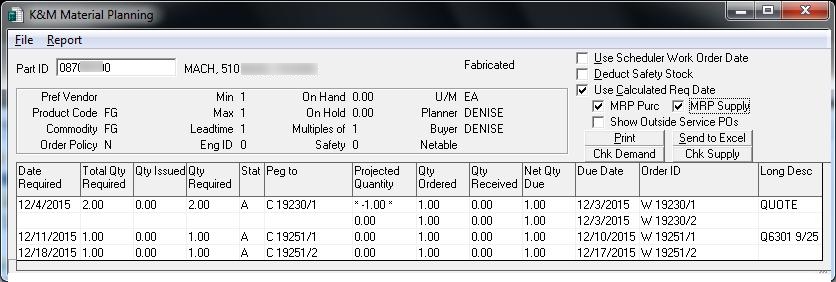


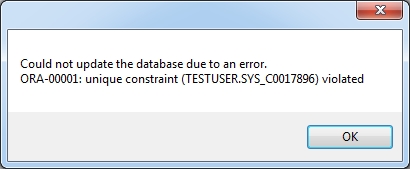


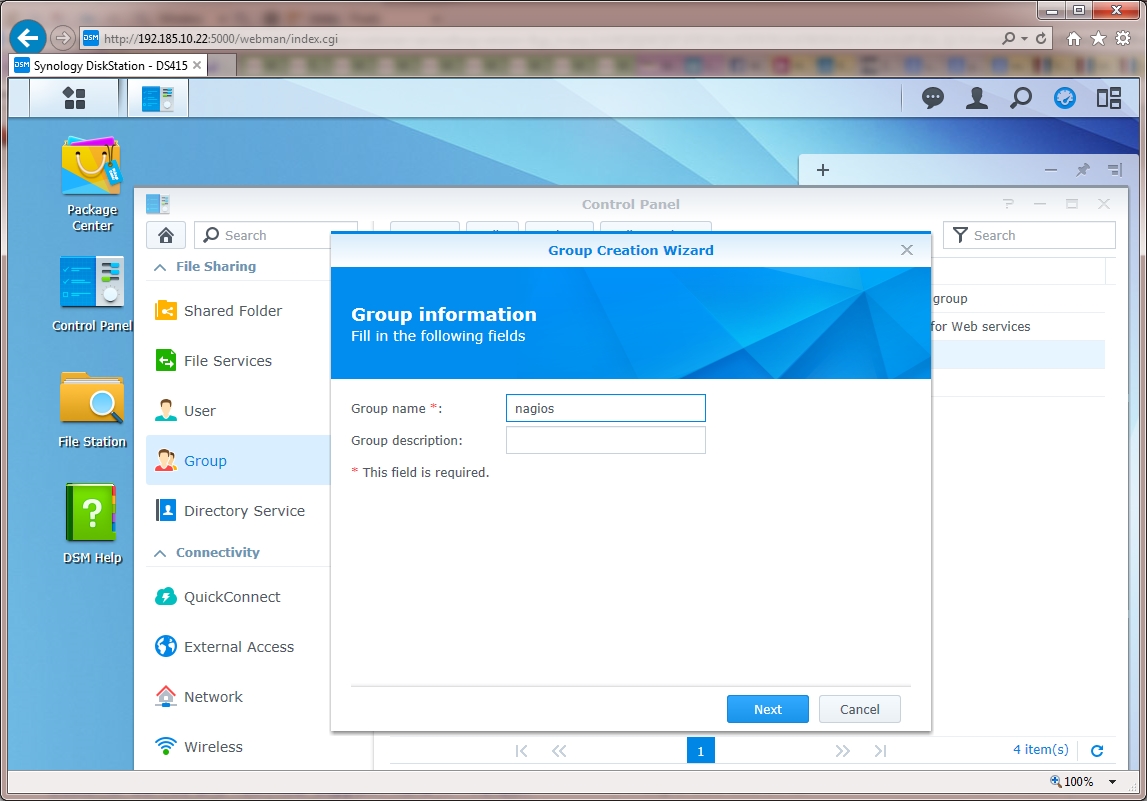


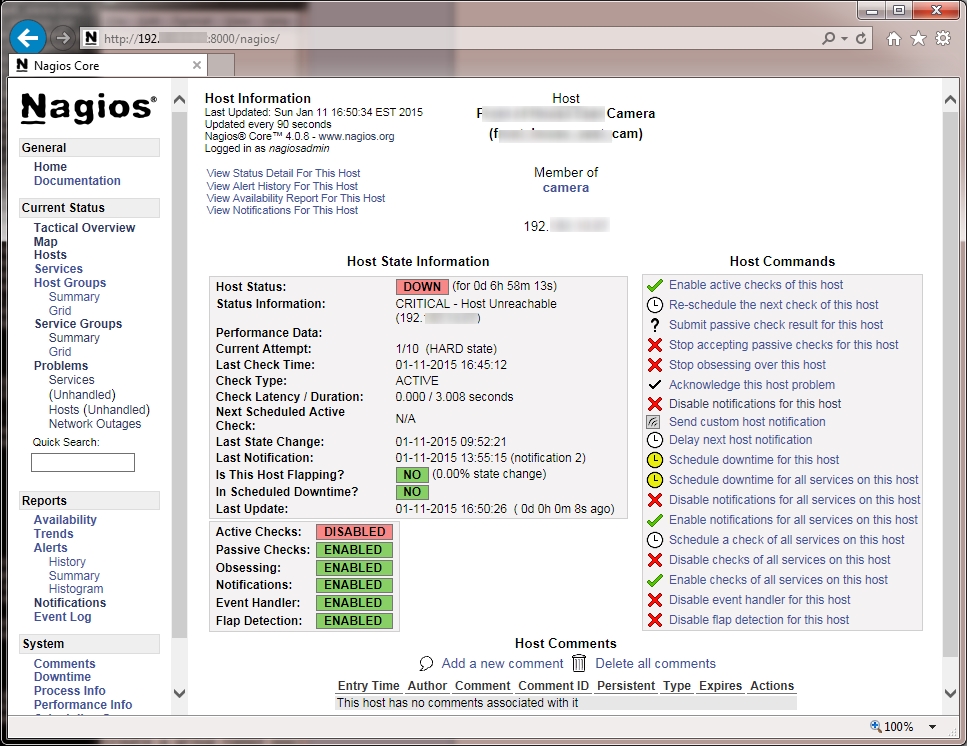

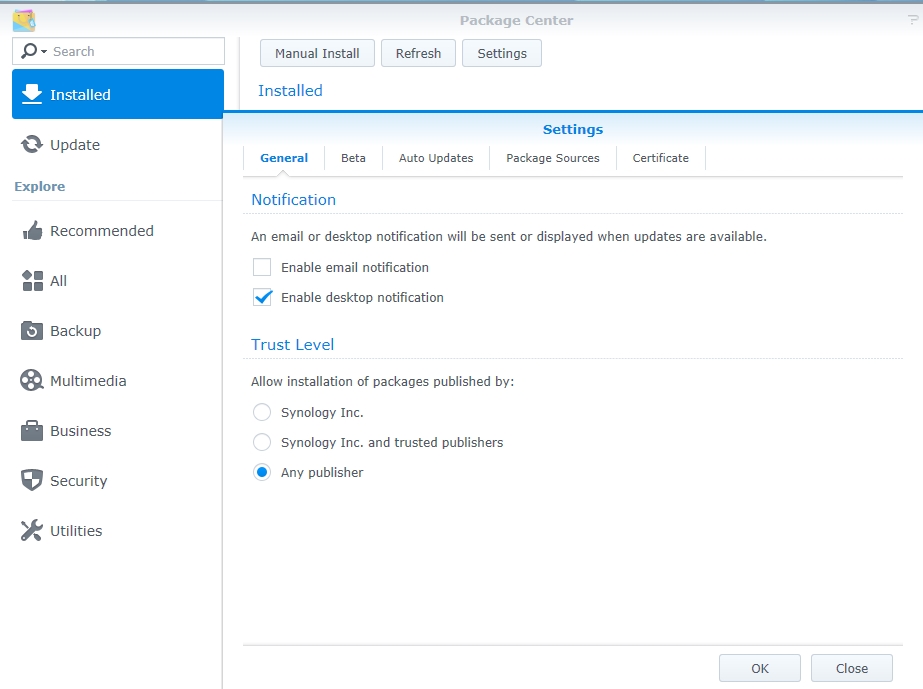
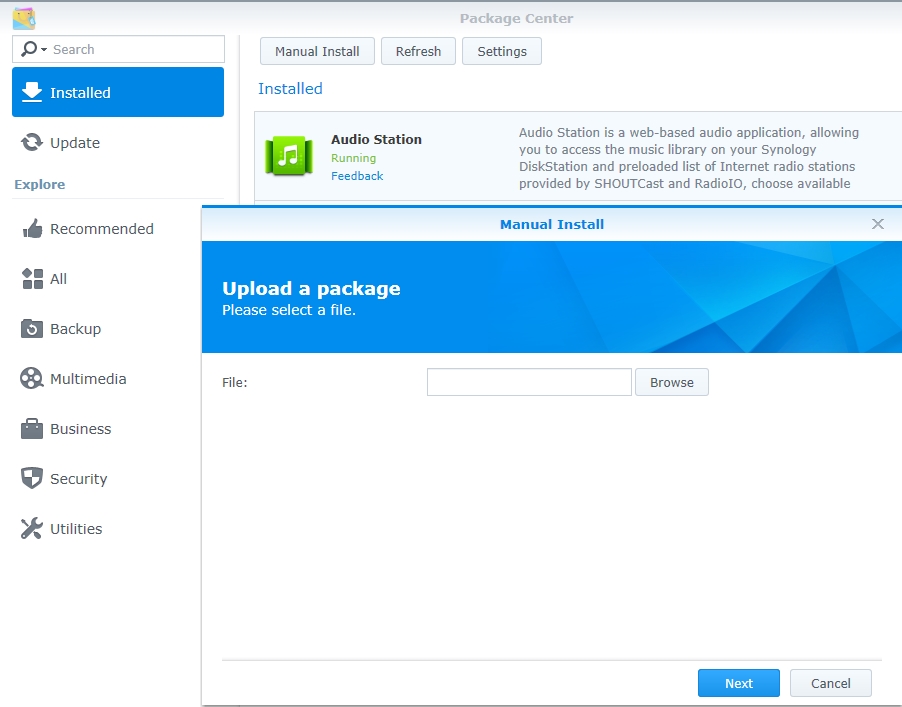


Recent Comments